Home About The Fame! Contact

Thursday, 24 November 2011

Snow Queen

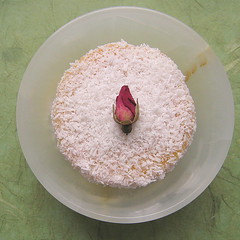
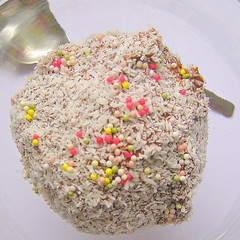
If I told you this was taken at night with the kitchen light on,
you'd be able to believe me, wouldn't you? This is white as snow, honestly.


I have to be quick. I have so much to do. But I wanted to share video number 3 for the Russell Hobbs Allure Challenge. Yes, that is Mr. Other P shirking around in the background of the video. He's never far away when there's a cocktail being blended.

One confession I have is that I stole this recipe - shamefully and shamelessly - from my favourite local cocktail place years ago. They don't do it anymore, you can only get something called a Coconut Daiquiri (which is not the same thing). So it turns out my theft was both timely and fortunate. Lovely.

If you hate coconut, then this is not for you. But for the rest of us, this is officially the best cocktail out there.

I'm pretty much fighting a losing battle in this competition. But I hope you're enjoying the videos, since all this really is is a bit of fun!

I have some non-competition posts coming up too shortly, so stay with...

Snow Queen

You will need:

1 measure Malibu
1 measure vanilla vodka (I use Absolut)
1 measure sugar syrup
2 measures coconut cream
good squeeze of lime juice
ice to taste

  1. This is one step deliciousness. Just chuck it all in a blender and whizz. Amazing stuff.

Thursday, 17 November 2011

Banana, Sour Cream and Golden Syrup Cheesecakes


Plastic pandas in their natural habitat - the banana cheesecake. Honestly: who needs David Attenborough?

My second video for the Russell Hobs Allure Challenge is now online. You can watch (and 'like'!) it here. If watching me make little Banana, Sour Cream and Golden Syrup Cheesecakes is your thing, that is. It's amazing what you can watch on the Internet these days.

And by the way, that's my favourite T-shirt (I identify heavily with Linus, though am perhaps more of a Charlie Brown, truth be told.). Please appreciate.

OK, enough self promo. Time to apologise to Paris. I have been overly harsh in previous posts and feel I should make amends. It's going to be difficult: there's no 12 Step Programme for this. It's just that as I write from my hotel room here and I remember the lovely day I spent walking around the 15th yesterday, all I can think of is how bad I feel about my previous slatings.

Walking down Avenue de Souffren in the late afternoon sun (freezing though it was!), it struck me how beautiful this city is. I know that area is not exactly a tourist hot spot, being as it is so close to the various ministries and administrative buildings, but I don't care. It was beautiful. The old buildings, fading sun and falling leaves were, dare I say it, semi-romantic. If only Mr. Other P were with me. We could have shared a vin chaud.

I even had a little day dream about living here for a while, but a glance into the estate agency's window brought me straight back down to Earth with a crash, bang and wallop. (As did grazing my hand on a rusty rail while brushing against it: do I now need a Tetanus? Oh God. The worry...) You would not believe how expensive flats are in Paris. I'll make do with Cardiff for the time being.

I'm going to rush round the market later and buy some goodies to take home. This new found liking for things French will mean that my inner Julia Child needs to be sated, even if it's only with quince jelly and unusually flavoured tisanes.

To the task in hand: cheesecakes. I'll be honest. These were VERY delicious. Definitely on my list of If-People-Reading-This-Have-Any-Sense-They-Will-Actually-Make-These dishes, though maybe not in pole position. That spot is still accorded to these. But whatever: here's how to cheesecake.

Banana, Sour Cream and Golden Syrup Cheesecakes

You will need:

5 hobnob biscuits (optional)
150g cream cheese
75g caster sugar
1 egg
squeeze of lemon juice
1 tsp vanilla
pinch salt
150g sour cream
1 banana
golden syrup to taste

  1. Whisk together cream cheese and sugar until smooth (for about 2 minutes). I used the Russell Hobbs Allure Hand Mixer, and in all honestly, was really impressed. This thing has LOADS more power and is much sturdier than the old mixer I have in my cupboard.
  2. Add the egg, lemon and salt, and beat again until just incorporated.
  3. In a separate bowl, mash the banana, sour cream and vanilla together; add this to the other mixture and beat well.
  4. Prepare the cheesecakes: put a hobnob (can be made without if you prefer a crustless cheesecake) into each of 5 little ramekins. Top with the mixture and bake in a bain marie at 180°C for 20-25 minutes.
  5. Chill in the fridge and top with syrup before serving.

Thursday, 10 November 2011

Crab Apple Jelly


Hey everyone! Do you want to make crab apple jelly? Brilliant, me too. Let's get started.


You'll need a big bag of crab apples. Good luck with that; they are a bit of a pain to harvest. If you don't live near a tree, you can just use cooking apples from the greengrocer, but your jelly won't be the same beautiful claret-y pink colour. I know that sounds unfair, but it's best you're prepared for the shattering truth.


Wash your crabbies well. Outside is not as clean as we like to think.

I got my apples from my friend Rowanne's garden by the way. I've said I was going to make crab apple jelly with her under appreciated pommes for the past two years and this year I finally got around to it. Someone somewhere is applauding me, I just know it.


Chop the apples up roughly and put them in a large pan with a few cloves. Just barely cover them with water and turn on the heat.


Cook them gently until the fruit is pulpy. I warn you that this takes about 40 minutes. Having expected it to take 10, I was rather annoyed at this point. That's half an hour I'll never get back.


Now everything gets rather busy. You need to strain the pulpy fruit through a jelly bag for about 4 hours. Or through muslin. Or, if you're me, an old Ikea tea towel. Before using it, boil it in a pot of water for a minute or so. Cleanliness is next to Godliness, after all.


Look at the beautiful pink juice! Can you bear how pretty it is? (I can't.)

It all gets a bit exciting at this point, and I didn't have time to take pictures. But basically, you need to sterilise some jars. I used regular old jam ones, and did it the simple way: washed them in hot, soapy water, rinsed them and dried them off in a low oven.

Meanwhile, back at the ranch, measure the juice you collected. For every 600ml, weigh out 450g granulated sugar. Heat the juice in a large pan, and when it boils, add the sugar, stirring until it dissolves. Then boil rapidly for about 8 minutes without stirring, until setting point is reached.


I hear you thinking, 'Wha..?'. Don't worry. This is easy. Pop a saucer in the fridge to chill before you begin, and when the 8 minutes are up, drip a little jelly onto it. If it gels (and it surely will, because crab apples are Pectin Kings. If the fruit garden had a fitness scene, the crap apples would be the guys working out on Muscle Beach), you've reached the setting point. Pour the hot jelly into a jug, then into your waiting (still warm) jars. Seal immediately with clean lids, which you can sterilise by boiling in water for 10 minutes.

Serve with cheese or roast meats.

That was free deliciousness I just showed you how to make there. Hope you liked it.

Sunday, 6 November 2011

Chocolate Marshmallow Pots

Until you have eaten one of my chocolate pots with a hot pink melamine
teaspoon, you cannot have truly known happiness.


And that's just a fact, friends.

I have some exciting news. I have been asked, by the good people at Russell Hobbs, to road test some of their Allure appliance range. I'm taking part in their cookery challenge, and submitting four (count them!) videos and recipes. My first video, for these luscious Chocolate Marshmallow Pots, is available to view here. Please do NOT mention how awful I look, and how messy my kitchen is. I am no professional TV chef!

Please DO 'like' or tweet about how much you like my video, using the link provided. There'll be another each week for the next four weeks, and I'll be counting on all of you lovely lot to make sure that I get at least two 'likes'. I don't mind losing though. Having you all come back here regularly makes me the happiest loser in town!

Now: the recipe theme for this first challenge was Bonfire Night. I'm not really a fire and smoke kind of a guy to be honest. I mean, I love a sparkler under the right circumstances, but only if there's a bucket of water nearby for me to drop them into afterwards. I remember those terrifying firework safety campaign videos. I was an Eighties child after all.

Chocolate pots don't scream 'Guy Faulkes'. But give a moment to explain myself. I got the idea from the hot chocolate and marshmallows that saved me from icing over at the firework display we went to four years ago in Cardiff. We were 'on time' for the 7pm start. A mistake, friends. The organisers hadn't even lit the fire yet. We had to wait until 9pm in the cold, dark fog. I wanted to die I was so cold, and had it not been for Francesco and his kind purchase of marshmallow topped cocoas, I probably would have. It is now my November beverage essential, and thus the inspiration for my recipe. (Though only the video has the full, marshmallowed and sparklered version - I forgot to take photos of those.)

(Which also should have been for a condiment or dip, but hey: I'm a rule breaker!)

My Lady Grey tea packaging reminds me on a daily basis that Noel Coward once said it would be awful to live in a country where people didn't drink tea. Noel - you're a man after my own. But really, it would be even worse to live in a country without HC and M. Especially on Bonfire Night.

These are so easy to make. Watch.


Hot Chocolate and Marshmallow Pots

You will need:

175g plain chocolate
250ml single cream
1 egg
marshmallows

  1. Heat the cream until it is about to boil (but don't let it!).
  2. In a chopper or food processor (I used the Allure Mini Ball Chopper , process the chocolate until finely chopped. Pour the hot cream over the chocolate and leave for a minute to melt.
  3. Process the mixture for a few seconds.
  4. Crack the egg into the mixture and process for thirty seconds.
  5. Pour into small pots or jars, and chill until set. Garnish with marshmallows, though this is optional. Pink melamine spoons are not.
Related Posts with Thumbnails