Home About The Fame! Contact

Monday 31 May 2010

Pie of the Month - May


I swore when making this here pie that I would never attempt pastry again.

No, that's not a positive way in to this, but it is the truth. I think that making pastry on a baking hot day is anyway only mere steps away from full-blown madness, but I had to otherwise we'd have no pie for May. In addition to the heat, the phone would NOT STOP ringing. Sales calls. Recorded messages. The lot. I thought I was going to have to kill myself when I came back after the last call I bothered to answer (stopping to wipe my hands and de-flour and butter myself, as I had done for each and every one of the other calls) to find that my second batch of pastry (for the pie lid) had dried out in the heat and would not roll out.

Stress pie!

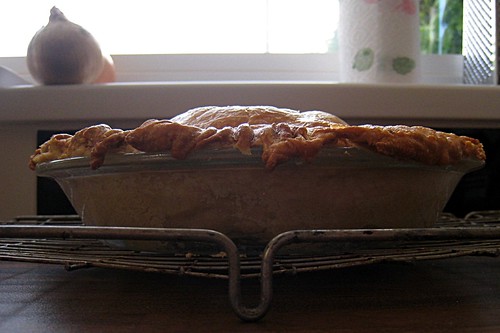
But I didn't. I just ran out to the Co-Op and bought a sheet of puff pastry. I wasn't about to make more of my own shortcrust - far too frustrated for that.

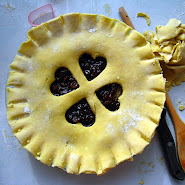
Anyway, this month's pie is a butter pie, special delicacy of the North West of England. Not the bit that I am actually from, but the bit slightly further up where my family had the greengrocers. It's a butter pie!

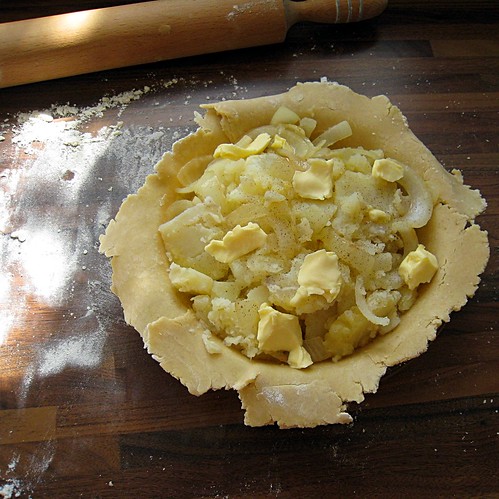
Butter pie is basically just buttered potatoes and onions baked in pastry. Yup. That's it. I know how that sounds, but just think about how good tortilla is for it's simple savoury goodness, and you're there.


Wikipedia tells us that:

The butter pie is thought to have been created for workers from Lancashire's Catholic community, to consume on days (mainly Friday) when meat could not be eaten. To older generations, they are sometimes known as 'Catholic pies' or 'Friday pies'.


I have never heard them called either of those things, but thankfully, I am not yet a member of 'the older generation'. I've also never seen them served 'on a barm cake', but that would be something special!


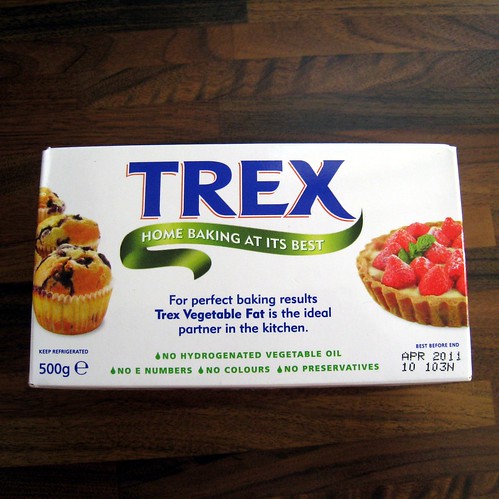
Yeah, I've gone white trash now. I keep Trex in the fridge...

I made this recipe up, and I think anyone making a butter pie would just use whatever quantities fit their dishes. I think if I made it again though, I wouldn't bother making the pastry, as although it's traditional to make it with shortcrust, the puff was lovely. And obviously, nobody ever makes that themselves.

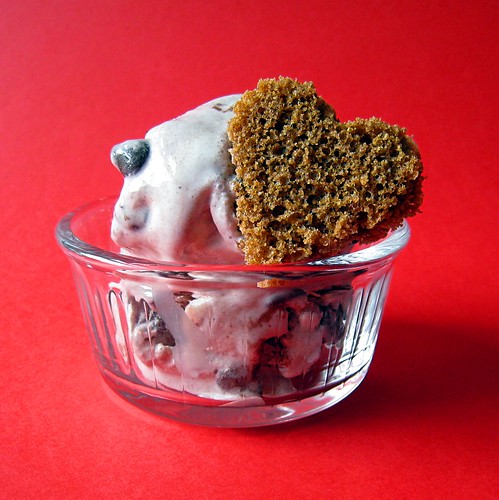
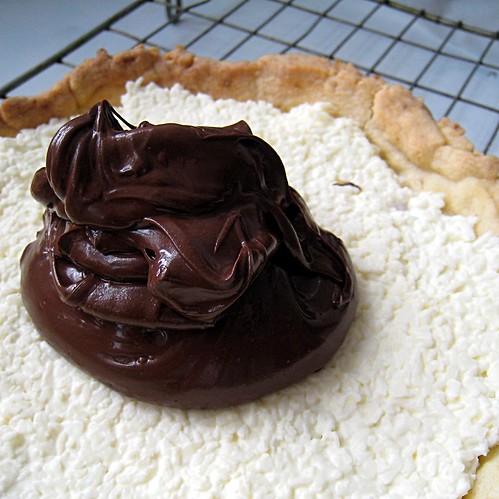
Apologies for the poor quality photos. I was stressed in the kitchen for this!

Ee up duck, let's gerron wit' recipe.

Butter Pie

You will need:

shortcrust pastry made with half butter/half Trex or lard (for a short crust, aptly enough), or use bought puff pastry
potatoes
1 onion
butter
salt and pepper

  1. Peel and cut the potatoes into chunks. Boil until just soft; drain.
  2. Fry the chopped onion in plenty of butter. Go slowly, and don't let it brown.
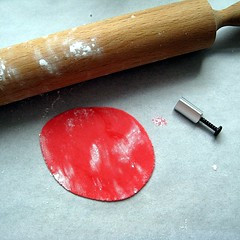
  3. Line a pie dish with pastry.
  4. Layer the potatoes and onions in the lined pie dish. Add LOTS of salt and pepper, and dot with more butter. Be generous.
  5. Use the leftover pastry to make a pie lid. Bake in a 200°C oven until browned and piping hot throughout. Mine took about 45 minutes.
  6. Serve hot or cold, in generous slices.

Friday 28 May 2010

A Week of Ice-Creams: Day Five

Mascarpone Ice-Cream. For the ice-cream machineless.


And he's back!

Well, let me tell you straight - I have never made so much ice-cream in one week, and thank goodness for BBQ weather and the chance to unload some of my creations on friends this evening. It's been calorific, to be sure.

I have a treat for you today, for the last in my week of ice-creams. I'm making one that doesn't need an ice-cream maker. And in all honesty, I think it might be the best one of all (except for the melon sorbet, which I really, really do love).


It's an adaptation of an Anna del Conte recipe for gelato de mascarpone. Bears little resemblance in fact, because I added some Bailey's, and an Italian would never do that. But I didn't want to open the new bottle of amaretto just for this (am I the only one who doesn't like opening new bottles?), and we have Irish cream in the house.

Please note:

This is the creamiest, most luscious ice-cream I have ever made. You should make some too.

I tried to fashion my ice-cream into little cupcakes. I'm not trying to be original, I just don't own ice lolly moulds. But they should be first choice. I mean, let's be honest: I have pulled off some terrible food styling in my time, and posted a bad photo or two on Delicious Delicious Delicious, but we're reaching new levels of awful here. I hope you aren't put off. Seriously, all you need is a wooden spoon and three or four minutes. You'll never buy ice-cream again.

Scoop, sprinkle and freeze.


Mascarpone Ice-Cream
adapted from AMARETTO, APPLE CAKE AND ARTICHOKES: THE BEST OF ANNA DEL CONTE

You will need:

250g mascarpone
2 egg yolks
80g icing sugar
3 tbsp Bailey's (or amaretto, or use 1 tsp vanilla)

  1. Mix everything together in a bowl using a wooden spoon. This takes about two minutes.
  2. Spoon into serving dishes, cupcake liners or lolly moulds, and freeze.
  3. Let ripen in the fridge for half an hour before serving.

Thursday 27 May 2010

A Week of Ice-Creams: Day Four

Affogato.


If you could only have one ice-cream flavour for the rest of your life, which one would it be?

I don't think I'm a very vanilla type of person - 'vanilla', to me, says straight-laced, regular, line-toeing and very much of the ordinary. Which is ridiculous when you think that vanilla comes from such beautiful and exotic, far away countries as Tahiti and Madagascar. But this is what mass production of 'nature identical', synthetic flavourings does; it takes away all the mystery and intrigue, and makes the best favour out there seem everyday and hum-drum.

Fact is though, I would pick vanilla ice-cream. We're going to make some today. It's not the method I usually follow when I make ice-cream, which is the way an Italian taught me, but I'll post that technique another day. Today, I feel like making a custard-based ice. And it's going to be vanilla, because I have some great quality extract on hand, and also because I have so much ice-cream and froyo in my freezer drawers now that I need something that will last a while and goes with anything.


The thing with custard ices is that they have a much creamier and firmer texture than those with a milk base. This makes them perfect for an affogato, which I love love love. It's the way my mum used to eat her ice-cream when we were little - 'drowned' in coffee. And it happens to be the perfect way for a food blogger to photograph a single portion of vanilla ice-cream and get maximum pleasure from so-doing.


This ice-cream is wonderful with strawberries or raspberries, or any kind of sweet pie or cake too, though, so coffee-haters needn't start a riot and throw petrol bombs at me or anything. Not quite yet!


Vanilla Ice-Cream

You will need:

300ml whole milk
2 egg yolks
100g sugar
2 tsp vanilla extract (or seeds from one vanilla pod)
300ml double cream

  1. Heat the milk gently until almost boiling. While that's happening, beat the yolks, sugar and vanilla gently.
  2. Slowly pour the hot milk onto the yolks, whisking all the while. Pour the mixture back into the saucepan, and heat gently, stirring constantly with a wooden spoon, until the custard has thickened. It will be pale yellow - if you want a richer colour, use three yolks. I like a whiter ice-cream, so stick to two.
  3. Chill the custard for an hour or so.
  4. Whip the cream; fold into the custard.
  5. Churn the now snow-white custard in an ice-cream maker until you are happy with the texture.
  6. If not using immediately, freeze in a rigid plastic container.
  7. To make affogato, pour espresso over a scoop of ice-cream.

Wednesday 26 May 2010

A Week of Ice-Creams: Day Three

Melon Sorbet


You learn a lot in life from the job you do. I'm a flight attendant, and have discovered tons about myself, other people and the world since I started working as one. Number one in importance would be that good manners, consideration and respect for others will take you everywhere in life that you need to go; number two, that so long as your bag always contains something to write with, a toothbrush, and a tub of Nivea Crème, all will be well.

But I haven't always been a flight attendant. In one of my previous guises, I was greengrocer. Well, a junior greengrocer; my family used to own several fruit and vegetable shops, and I worked in them through most of school. (I've been a teacher, too - but we'll save that for another time!)

So what did I learn as a greengrocer? Well, a great deal actually. First of all, that as a 15-year old, my hands held exactly one ounce of monkey nuts (useful to know when preparing one pound bags!), and secondly that Americans call coriander cilantro, and courgettes zucchini.


I'm being silly. But actually, I did learn a lot of useful facts about fruit, such as how to tell when things are ripe, and when they come into season. And one of the most useful things I have always remembered is that most of the natural sugar deposits in a melon are in the mass of pulp containing the seeds. So if you throw that pulp away, you're basically putting the melon's flavour and sweet, floral fragrance in the bin.

This melon sorbet has only one ingredient in it, and that is the melon with which you make it, so it is essential that you press and squeeze as much juice out of the seed pulp as you can. Use a sieve and the back of a spoon, and press hard!

Today, I used a rock melon. My preference is for Galia or even watermelon, but I couldn't find any, and the honeydew I did see looked bland and unripe. Use whichever variety of melon is available.


Cover a scoop with Cointreau for a Melon-Orange version of 'Le Colonel', the vodka-drenched lemon sorbet you always see on dessert menus in French bistros.


If you find that your melon purée is not very sweet, add a spoonful or two of caster sugar, but hopefully, you won't need it. The markets are full of beautiful ripe melons at the moment, so with any luck, they will be as sweet as sugar cane anyway.

If this doesn't get you using that ice-cream maker more than once, nothing will.


Melon Sorbet

You will need:

1 ripe melon
caster sugar to taste (optional)

  1. Scoop the melon flesh into the goblet of a blender. Sieve the seed pulp to extract the juice and sugars; add this to the blender as well.
  2. Purée the fruit.
  3. Taste. It should be very sweet and fragrant. If in doubt, add a little sugar, and if you plan on keeping the sorbet for a while in the freezer, you should definitely do so - it will improve the texture.
  4. Churn in an ice-cream maker until set. Serve in scoops for dessert, or even between courses (if full-on dinner parties are your bag).

Tuesday 25 May 2010

A Week of Ice-Creams: Day Two

Chocolate Swirl Froyo


I promised myself I wouldn't do a chocolate flavoured ice this week. In so much as you can promise yourself anything. Does it matter if you break a promise to yourself? It's just that I think chocolate flavoured things are boring on the whole, and I never feel inspired when I see chocolate recipes. Do I want Delicious Delicious Delicious to be known for its boring and uninspiring content?

Hell no.

Ramekin by Duralex. Pain d'épice heart, stylist's own.


Anyway, I baked (yes, even in the heat) brownies today, as a thank you for a colleague of Mr. Other P's who is kindly keeping us in supply of fresh eggs from her hens, and having decided to make today's post a 'froyo' (and to dedicate it to Lora, who taught me this new term in a comment on yesterday's mango frozen yogurt) instead of a real ice-cream, I found myself reaching instinctively for my cocoa and chocolate chips. Well, they were on the counter. What can I say? Despite thinking chocolate is the least interesting flavour for ice-cream by far, here I am making a chocolate swirl froyo. I guess it's plain to see: I am flaky, inconsistent, and contradict myself.

But bothered about all that. I really liked this!

It's supposed to me a chocolate swirled froyo, but I imagine there's a special swirling technique that ice-cream manufacturers are keeping to themselves because I messed the ripple effect right up. But you know what? This is fantastic stuff. So what if it's a uniform cocoa-cream colour, and lacks definition? Stop being so judgemental!


Chocolate Swirl Froyo

You will need:

500ml Greek yogurt (full fat!)
150ml milk (you can choose which kind, we always have skimmed)
2 tsp vanilla extract
2 tbsp sugar

100g chocolate chips
1 tbsp cocoa powder

  1. Mix the first four ingredients together, and pour into your chilled ice-cream maker.
  2. Churn for twenty minutes or so, and then remove to a chilled bowl.
  3. Fold in the chocolate chips, working quickly.
  4. Sprinkle over the cocoa, and fold through slightly; transfer froyo to a rigid plastic container and store in the freezer until needed.
  5. Allow to 'ripen' in the fridge for half an hour before serving.

Monday 24 May 2010

A Week of Ice-Creams: Day One

Mango Frozen Yogurt


Or, getting some use out of your ice-cream maker.

I actually use my ice-cream maker a lot. Which is because not long after I bought it, I read an article in the paper that claimed ice-cream makers were the most likely kitchen appliance to be bought and used once. I don't like that statistic.

It's extremely hot in Britain now. I came back home from my last trip planning to bake all kinds of goodies for the blog, and all my plans have been scuppered by the beautiful sunshine. So I thought I'd spend the week making frozen desserts and trying to encourage you, my wonderful readers, to do something about the terrible claim made by the writer of that fateful newspaper article.

The ice-cream maker that I use is this Magimix Le Glacier, and let me tell you, I love it. I got it years ago, when we had another crazily hot Summer and we had just moved back to Cardiff. We didn't really have two pennies to rub together so I don't know what I was thinking buying something like an ice-cream maker on a whim, but I did, and we spent the whole Summer eating cones filled with flavours of ice-cream you could never buy in shops.

The most successful flavour of that first year, and probably the one I make most often, is not really an ice-cream; it's frozen yogurt. But Greek yogurt, so you still get all the calories - I'd hate to miss out. And it's my favourite flavour - mango (yes, again!).


Alphonso mango purée


Today's ice-cream is another one of those ideas that I feel guilty about posting - like the bizcocho, the sprinkles, the kulfi and the spoons, it is so simple that anybody could do it, and it takes about three seconds to make. But surely that should go in its favour?


Mango Frozen Yogurt

You will need:

Greek yogurt
Mango purée

  1. The amount of yogurt and mango purée (which I buy in a tin from my local Indian store, and usually keep leftovers in my fridge - if you can't find it, whizz up some fresh mango, or a tin of slices) used will depend on your machine's capacity. Mine takes about 700ml, so I use about 450ml yogurt and make up the rest of the volume with fruit purée. You can vary it - more yogurt gives a creamier texture.
  2. Mix the two ingredients together well; pour into your ice-cream maker.
  3. Churn for 20 minutes or so, until the ice-cream is frozen.

Thursday 20 May 2010

Emergency Sprinkles!


We've all been there. I will not accept, however you plead, that even one of you, not a single one, has never had the misfortune of being in that terrible situation of knowing you need a gift for somebody and have no time to go shopping. It might be a birthday party that crept up on you, it might be that you're going to see your pregnant sister who's about to drop her first child or it might even be both.

(For me, it has been both in the last few weeks. Remain calm: I am a survivor.)

Nobody likes being in these situations. And unless you own your own boutique, I think the only way out of them is to keep a well stocked larder (flour, sugar, eggs and what-not), and above all, some marzipan, food colourings and one of these cutters. Friends: we are going to bake our way out of this mess. Roll up your sleeves, and get out your mixing bowls.

Actually, you don't even need to make the cake yourself. I don't care if you buy one. But making your own sprinkles is going to make it look as though you didn't forget the occasion, but rather, had the foresight to plan a little cake-off to mark it.

This is going to change your life; pay attention.


Get yourself some marzipan, just a little chunk. Colour it; roll it out on a flat surface dusted with icing sugar.


Start stamping away with your cutter. Mine is a heart shape, but they have a whole range. You could get quite carried away.


Admire your handiwork, but not for too long... Time's a ticking.

If you want, add glitter and do different colours. Now run to the party and thank me later.

Disclaimer: I did not forget my sister and her baby. I just didn't think about baking anything until the last minute. Do you think I'd forget something like that? What do you take me for?

Monday 17 May 2010

Mango and Jasmine Macarons


I'm starting to feel slightly foolish about slating the macaron craze. See, I have been making more of them. It's becoming a bit of an addiction. Like gambling. Only instead of wondering whether or not my horse will come in, I am betting on whether or not I'll get good mac shells, with smooth tops and feet. I love the pressure and not knowing!


I don't know what came over me - flowers from the garden and all that - but I seem to have found my inner Mowie Kay!


A week or so ago I was in the Isetan food hall in Shinjuku, Tokyo, which is something of a macaron paradise. I was shopping for sakura mochi, which I have a bit of a thing for (I won't eat the cheap ones you can get at supermarkets and convenience stores), but ended up seduced by the bright colours of the almond discs.


I don't remember whose counter I ended up at (I know it was opposite Aoki Sadaharu, but that's all), and went for a jasmine and mango flavoured macaron. The girl behind the counter asked if I wanted it wrapping. Ha! I snaffled it up right there.

In all honesty, it wasn't up to much. Very sweet, and the shell wasn't chewy enough. But I liked the flavour combination, and so when I found some jasmine extract in my favourite Parisian baking supply store the following week, I didn't hang around.


I have become one of those terrible, 'Look at my smooth shells and feet' photo-bloggers - sorry.


I have a ton of mango purée on hand for another, top secret project (I love a little blog suspense), so the macs this week were actually a way of using up leftovers. A little economical luxury in the kitchen, if you will. Mixed with some mascarpone cheese, the purée made a perfect filling for the mango-coloured shells.

I used the same recipe as usual for these macarons, flavour differences allowing, but changed the way I bake them. I usually fold a double thickness of greaseproof paper, and bake them on that, on the thick metal tray that came with my oven, but last time it stuck and I was so devastated that I almost killed myself. Not wanting to undergo such suicidal feelings again this time, I decided to switch things up, and bought some 'Baking Paper' (not parchment) from Tesco. I am in love; the shells lifted clean off and had perfect bottoms. Photographic evidence is included with this post. Basically, I am never using anything else again!

L'évidence.

Mango and Jasmine Macarons
You will need:

110g icing sugar
50g ground almonds

1 tsp jasmine extract

2 egg whites (60g), aged for 24 hours (just leave them on the kitchen counter, uncovered)

40g caster sugar

small dab of tangerine food colour gel


50g mascarpone cheese

40ml mango purée

  1. Sift the 110g icing sugar into a large bowl, and mix in the almonds.
  2. In another bowl, whisk the egg whites until frothy, then slowly whisk in the caster sugar until you have soft peaking meringue. Add the dab of colour gel and jasmine, and carry on whisking until stiff peaks form.
  3. Add the almond and sugar mixture, and fold in. You are supposed to do this in exactly 50 strokes, and turn the bowl 45° after every tenth stroke. I don't think it's of paramount importance - you should just have a smooth mixture.
  4. Put this mix into a piping bag with the end snipped off, and pipe circles about 2 inches in diameter and well spaced apart on a lined baking sheet. You should have between 28 and 30 blobs of mixture. Let's call it 29.
  5. Let them sit for 30 minutes while you pre-heat the oven to 150°C.
  6. Bake for 12 minutes on the bottom shelf. Cool completely on the sheet, and then remove using a pallet knife.
  7. For the filling: beat together the mascarpone and mango until smooth and pale orange in colour; use to put the macarons together.

Wednesday 12 May 2010

Rome Guide: Dolciumi e frutta secca onorati dal 1937

It's like a grown-up pick and mix!

OK, I know that normally when I do these Rome Guides I play along as if we've been on some lovely walk around the city, eating and drinking whatever we (I) please, but it's not going to be like that today.


Today, I want to let you know about the place I buy the bulk of my baking ingredients and sprinklies and sparklies for cake decorating - wafer flowers, dragees and the like.


The window display offers promise, no?


Ever since I posted about my Chocolate Party Spoons people have been asking me where I buy my loot (the technical term for sugar decorations). I have answered enough emails; now you know. Italy, on the whole, is a great place to get hold of pretty sweets and whatnots, but this shop, on Corso Rinascimento is a treasure trove.

They sell candied fruits that shimmer like jewels, candied pumpkin (which has been purchased for this year's Christmas Cake) and have literally jars of sprinkles and sweeties which are just perfect for cakes. Oh, and you'll want some of the chocolate covered pistachios as well.


This became mine, though I am sure they'll have more.

Happily, there is a small webpage for you to further explore here, but you can find the store itself close to Piazza Navona.


Dolciumi e frutta secca
Corso Rinascimento, 8
Rome

Friday 7 May 2010

Crème de Violet Macarons


A friend recently told me that Delicious Delicious Delicious has undergone a makeover and is now 'an explosion of colour.' I didn't really know what she meant, but I suppose actually the description is fair. Since its birth last year, the blog has had a fair few different looks - three columns, two columns, three columns again, several different templates... The list goes on. But it's true that there is a lot of colour in the sidebars, and do you know what? I tend to forget it's there.

Yup. The man who spends ages trying to make his food look pretty forgets about it once it is up here on show.

The pictures I choose to border the text on my blog are the ones I am relatively happy with (you all know of my ongoing struggles with lighting and basic inability to take a decent shot of anything I make) and don't really want to forget about. It started with the lamingtons, because making them was such fun that I wanted a permanent reminder of those crazy coconut and crumb filled blue-gray Winter days on the blog's front page. Then I added more pictures and forgot about the lams for a while. The only ones that repeatedly caught my attention (and still do) were the Purple Rain Lamingtons; they were so delicious.

As a tribute to Delicious Delicious Delicious' latest puff quote, I wanted my next batch of home made macs to be 'an explosion of colour', too, like the ones you see in the food halls of trendy department stores. I mean, have a look at what Pierre Hermé gets away with. His are basically the street walkers of the macaron world! I first thought to try to turn out a batch of hot pink macaron shells, and sandwich them with a spicy, cinnamon infused slut-red ganache, but I didn't add enough colouring to the macaron batter and ended up with cherry blossom coloured macarons. Which were also strange shapes - turns out you were right, Mardi. My first time must have been pure luck; these are tempermental cookies!

Anyway, I wasted no time on the failed pinkies. I just ate them, right off the baking sheet, and moved on. (And no, you can't see them - I deleted the photos.) But needing inspiration and being short on time (I had exactly one day before leaving on another trip, my first since the ash disaster - fingers crossed we have no repeats of that!), I decided to trawl the net for some ideas. Fruitless. As I was just giving up, the Purple Rain Lamingtons jumped out at me, tantilizingly, from the side of the page.

One word: convinced.


Out came the food colouring and violet liqueur, and I re-read Ms. Humble's seminal French Macaron 101 to try and trouble shoot my failed slut macs.

(I think I over beat the mixture, but we'll never know for sure.)

I was happy this time. The reason? My beautiful, smooth shells. The key is to use as finely ground almonds as you can get. I did this by sifting my ready-ground almonds before weighing them out; all the chunky, granular almond pieces went back into the packet, and I used only the powdery almond dust that passed through my mesh sieve to make the macaron batter. You think this baker has a food processor to grind almonds? Well, he doesn't.

I am repeating the recipe from my grapefruit and lychee macarons post. The only difference this time is that I used the seeds of one vanilla pod instead of the grapefruit zest in the batter, and flavoured the buttercream with Crème de Violet instead of Soho. If you really wanted to go for it, you could grind up a packet of Parma Violets to use in place of the vanilla, but I hate them, so didn't.

My photos were taken hurriedly (I was icing a layer cake for a friend's birthday party and making my own sprinkles at the same time, and we all know that men can't multi-task to save their lives), in poor lighting at the end of the day, so you shall have to forgive me. All I will say is that later on, as an after thought, we sprinkled the macarons with Nite Violet Edible Glitter and had a full on Pre-Party Purple Party. Sugary, sparkling bliss.


Crème de Violet Macarons

You will need:

110g icing sugar
50g ground almonds

seeds from 1 vanilla pod

2 egg whites (60g), aged for 24 hours (just leave them on the kitchen counter, uncovered)

40g caster sugar

small dab of grape violet food colour gel


50g soft butter

125g icing sugar

45ml (3 tbsp) Crème de Violet liqueur

  1. Sift the 110g icing sugar into a large bowl, and mix in the almonds and vanilla.
  2. In another bowl, whisk the egg whites until frothy, then slowly whisk in the caster sugar until you have soft peaking meringue. Add the dab of colour gel, and carry on whisking until stiff peaks form.
  3. Add the almond and sugar mixture, and fold in. You are supposed to do this in exactly 50 strokes, and turn the bowl 45° after every tenth stroke. I don't think it's of paramount importance - you should just have a smooth mixture.
  4. Put this mix into a piping bag with the end snipped off, and pipe circles about 2 inches in diameter and well spaced apart on a lined baking sheet. You should have between 28 and 30 blobs of mixture. Let's call it 29.
  5. Let them sit for 30 minutes while you pre-heat the oven to 150°C.
  6. Bake for 12 minutes on the bottom shelf. Cool completely on the sheet, and then remove using a pallet knife.
  7. For the filling: beat together the liqueur, 125g icing sugar and 50g butter until smooth and fluffy; use to put the macarons together, and lick the rest from the bowl greedily. If you prefer, make the frosting from the original Purple Rain Lamingtons, which also contained cream cheese. Lovely stuff!

Monday 3 May 2010

Boh Tea Plantation

I'd like you to meet Mr. Boh. (I love his jacket!)

Remember how I said that I drank more tea than anybody else I know? Well, it's true. And I am afraid that the tea obsession is not just with drinking it. Whilst clearing the book shelves the other day, I found a book I'd forgotten about, Tea: The Drink That Changed the World and thought it might be of interest to those similarly chai-centric.

When you have a cup of tea, you don't think about the history of the drink itself, do you? You're just looking for refreshment! This book will change that: tea, everyday and humdrum though it may seem, has over the years caused (and paid for) numerous wars, fuelled the drug trade, helped advance medical science and changed beyond recognition the geographical and socio-political (never thought I'd use that word on this blog!) landscapes of countries like India, Sri Lanka and Indonesia. John Griffiths' book is fascinating, a real page turner, and for those like myself makes for calming reading - his preferred method of brewing tea (p. 235) puts mine in the shade. Evidently I am not the only one with particular tastes.


When I read John's book over Christmas several years ago, I decided I wanted to see how tea is produced for myself. It became number two on my list of food-related things to do whilst on holiday (number one was to drink coconut water through a straw, fresh from the coconut, and preferably on the beach- am I the only one who has lists like that?)

Anyway, numbers one and two were both happily achieved early the following year on a trip to Singapore and Malaysia. We took a detour to the Cameron Highlands - which was a rather curious experience, I definitely recommend exploring the area if you ever get the chance - and visited the Boh Sungei Palas Tea Gardens, north of Brinchang. And since I found the photos of the occasion when rootling around on my computer this morning, I thought we'd go on a little tea plantation tour!

Ready? Let's go.


This is one of the (many) photos of the teas slopes I took.
I'm showing you this one because I'm in the others, and I'm shy.
But look how the tea grows in waves; isn't it beautiful?


This is part of the worker housing - historically, tea pickers have always lived on the tea farms. They have schools, churches and everything. I liked seeing their gardens. Evidently picking tea all day didn't stop them putting their green fingers to good use at home too.

An antique tea rolling table. I wanted to take this home with me, but Mr. Boh said no. It is enormous and really beautiful, though I'm not sure how much I'd like to sit at it rolling tea leaves all day.

Hibiscus, the National Flower of Malaysia. You have to make time for the flowers!


OK, nothing to do with Boh tea, this was just a banana leaf curry we had in a tiny place near the bus station in Tanah Rata - I think the whole thing, including teh tarik, cost us £1.
Super, and really interesting to see how Chinese and Indian flavours mingle.


If you ever make it to Sungei Palas, you can have a guided tour as I remember, but we got there late so it wasn't possible. The tea factory was also closed, although I have heard that it's a really fun experience.
Related Posts with Thumbnails