
Home About The Fame! Contact
Showing posts with label Pie of the Month. Show all posts

Tuesday, 28 December 2010

Pie of the Month - December


Sometimes, having a blog feels like having homework. Setting yourself the task of making a pie every month is one way to ensure it does. I will not be making pie so regularly in 2011.

No(pie)vember excluded, I have done all right, I suppose. Some months I was late with my assignments, and other months I got ahead and posted early. What did I learn from the whole experience?

Well, this is going to upset some readers, but it needs to be said. So get get ready.

I don't want to talk about the potatoes.

Pie is not that great. It's OK, but nobody is ever blown away by it. Ever. You can bake a cake, cook a steak, make jams or chutneys or even turn out a batch of home-made sweets and people will be infinitely more impressed than if you made perfect pastry and filled it with something delicious. It should not be this way, since all of the above involve considerably less time and effort than making a pie does, but sadly, I have found it to be so.

Sorry to upset you all.

I can try to lighten the mood by giving you a recipe for perfect short-crust pastry this time. It is the result of my year long pie project, and I hope making it will make you feel as if it was all worth it. Not that it was you who had to do it, mind.

Has the experience of pie making changed me? Well, no. I still get Mr. Other P to make the pastry whenever I need it. But I made all the pastry for the pies you see on here (save this month's mince pies, actually, but let's not obsess), and I did learn to love my nail brush in 2010.

You can see all the Pies of the Month here. There's no pie for November, but I have over the year made more pies than the ones I posted anyway so you can just imagine something that took lots of effort and went largely unappreciated. For 'tis the way of the pie after all.

This is my last post for 2010. There should have been more. When life gets busy, the blog suffers and I feel bad about it. But make sure you all come back next year. We're doing lamingtons again!

Have a Happy and Joyous New Year!

(Don't do anything stupid like going on a pie mission!)

Mr. P's Shortcrust

You will need:

250g cold butter, diced
500g plain flour
2 eggs

  1. Rub the cold fat into the flour. Stop when you have a crumby looking mixture, and can no longer bear to rub fat and flour together between your finger tips. The latter will probably happen first, so push yourself a little. You can do this.
  2. Beat the eggs lightly and stir into the crumb mixture to make a dough-like pastry.
  3. Form the mixture into a couple of balls, wrap in cling and chill until needed.
  4. Roll out on a floured surface and use as you wish. This amount makes enough pastry for 24 medium sized mince pies, or one double crusted large pie. Bake the pastry at 200°C until golden brown and crisp.

Thursday, 28 October 2010

Pie of the Month - October

Caramel drips. MY GOD!

Orange and vanilla are like good friends who don't make enough effort. They get lazy and don't make time to call each other, and sometimes you'll find one of them out by themselves and wonder why they didn't invite the other.

It's best not to get involved at times like that. If orange asks you if you saw vanilla at dessert the other day, my advice is to lie and say you were at home making a fruit salad. They'd only be mad at each other for a minute, and then somehow the flavour tables would turn and it would be you in the dog house. They really do care about each other underneath it all, you see.

Whenever they do make the effort to get together, though, it is easy to see why. Orange and vanilla, when paired, is the most perfect, heavenly (I've been reading Rose) combination in the whole wide world. This is a fact.

Should you be someone who has never actually witnessed their union: you have missed out. I suggest you mix a drop or two of real vanilla extract into your next glass of orange juice. And have it over ice; may as well make it a party. You'll feel like you're in Tahiti. Promise.

You could also make these tarts, which I have lovingly adapted from Jamie's 30-Minute Meals. I spoke of my new found fondness for Mr. O last time, so I don't need to enter into all that again here. But I do need to defend myself for not making my own pastry yet again.

Who are you calling a tart?

Pie of the Month is supposed to be about me getting to grips with pastry art. I don't really seem to be doing it. In fact, I actually am starting to think that it's not really worth making your own pastry at all, since what you can buy is so good. Don't tell anybody I said that though, for I have an image to maintain.

Jamie says it's fine to use bought puff for these Portuguese tarts though, so that's what I am doing. No point making your own if you're only going to bastardize it with a cinnamon swirl anyway!

Until Jamie, I didn't know that Portugal was famous for it's tarts. I am now feeling a trip to Lisbon may be on the cards. Maybe after I've paid for the new bathroom...

Portuguese Custard Tarts
adapted from Jamie's 30-Minute Meals


You will need:

1 packet ready rolled puff pastry
1 tbsp ground cinnamon
1 egg
125ml crème fraïche
125g sugar
1 orange
1 tsp real vanilla extract

  1. Sprinkle the puff pastry with the cinnamon, and quickly roll up, starting at the long end. I hope that makes sense - think Swiss roll.
  2. Cut the roll of cinnamoned pastry into six equal portions, and flatten then squash each portion into the holes of a 12-bun muffin tray. Bake for 8-10 minutes at 190°C.
  3. While the pastry is in the oven, mix the crème fraïche, egg, 25g sugar, vanilla and zest of an orange together. This will be the filling for your custard tarts.
  4. Take the pastry out of the oven. It will have puffed up; press it back down with the back of a spoon so as to make space for the custard. Fill the pastry cases with custard, and bake for 15 minutes more.
  5. When set, remove the tarts from the oven, and immediately transfer to a wire rack to cool slightly.
  6. Make the caramel: put 100g sugar and the juice from the orange in a saucepan and heat until they turn to a bubbling caramel. Spoon caramel over each tart and allow to cool. Delicious!

Monday, 18 October 2010

Pie of the Month - September

Ugly tarts need love too.


I know, I know. There was no pie in September. I'm not going to patronise you and say that I feel bad about it, because frankly, I had a fabulous September on holiday in Italy and was too busy having a good time to worry about pastry.

It is now the latter half of October and I still don't feel bad about having not made a pie last month, because all this cooler weather we seem to be having makes me feel fine about making two this month. Hurrah for cold, dry days - the sort of weather that makes you feel good about turning out a dozen frangipane tarts and eating them all in one go.

You have read correctly: eating them all in one go. Whilst I do not advise snaffling them down if it's just you, for three or four of you, it's fine.


Enough pie, time for a little provenance: I have a bit of an anti-Jamie Oliver thing. It's complicated, long-standing and deep rooted (all the best things in life are, dear), and I am not going to go into it here because I do have admiration for the chap (School Dinner Champion! Where was he when I was in school?), and am not into public mud slinging. Come over for an ale sometime, I'll tell you all about it.

Anyway, his new series and book has made me look at him in a new way. The man makes whole 4 course meals in 30 minutes! It is amazing; I am in awe.

I figured he might me able to help me out with my pie difficulties, and wasn't disappointed - there is plenty of pastry in this book. I made my own tart cases but he suggests buying them in. Whatever; these are 30 minute frangipane tarts: don't get het up.


I should tell you though, just so you do not think we are returning to the days of bin tarts... I made two piles of the tartlets when I had cooled them. One was the beauteous four or five that would grace the pages of Delicious Delicious Delicious, the other were the uglies that could be scoffed immediately. You can see that I scoffed the wrong pile. But I'm not sorry.

Frangipane Tarts
adapted from Jamie's 30-Minute Meals

You will need:

250g plain flour
125g butter, cold and cut into cubes
1 egg

100g ground almonds
100g butter, room temperature
100g caster sugar
1 egg

jam - enough to fill your tarts

  1. First make your pastry: rub the cold butter into the flour. Work quickly, because you don't want the butter to melt. But don't worry about it - I managed, so it isn't hard. When you have a crumby looking mixture, add the egg. Work it through with your hand, and gather the pastry together to form a ball. Wrap this in cling film, flatten slightly and chill for at least 30 minutes.
  2. Roll out the pastry on a floured surface; you want it thin. Cut rounds and use to line a muffin tray. You should have more than enough for 12, so keep the rest in the freezer. Unless you want to make more than 12.
  3. Line the pastry filled muffin indentations with foil, fill with beans, and bake at 200°C for about 15 minutes.
  4. Add a generous teaspoon of jam - I used raspberry and lemon and vanilla - to each tart case, then cover with a mound of frangipane. This is easy to make - using a spoon, beat together the egg, butter, almonds and sugar. That's it.
  5. Bake for around 20 minutes at 180­°C. Done.

Tuesday, 31 August 2010

Pie of the Month - August


So the good news is that I made a pie this month, and - woot! - on time.


Further wonderfulness: I also made the jam to fill it, and have a recipe for that to share with you as well.


However, with joy comes sorrow, and it is with regret that I inform you that I have to post the recipes out of sync (owing to the fact that it is today the thirty-first of August, so jam must come second or I'll be late with the pies again and you'll all think I'm slack), and also with poor photos (as seems to be standard these days on Delicious Delicious Delicious).


On the whole, I run through life with that most sacred of mantras 'Never apologise, never explain,' and it usually serves me well. However today I feel that some small explanation will help you understand why the photos look rushed and haven't been edited. You see, we went camping on my only two days off this week. There simply wasn't time to sort out pictures for this post and get everything else done before leaving. Messing about on the computer would have robbed me of the vital minutes it took me to floss; I'm not sacrificing good dental hygiene just so my pictures look nicer.


Neither should you.


Now, today's pie is crostata. I have written before about how much I love eating crostata for breakfast when in Rome, but haven't ever thought of it as a pie before. Nigella Lawson says it is though, so let's go with it.


The method she gives in How to be a Domestic Goddess is for a kind of cake-like pastry dough, made with whole eggs. This is not the same kind of crostata that I am used to, which has a firm pastry and a lattice top. But readers: is the word 'cake-like' not enough to make you want to try this out?


I couldn't find suitable tart tin, but remember Francesco telling me years ago that his mother makes crostata in an upturned lid belonging to a Pyrex oven dish, so decided to follow suit.


The result is seriously delicious, and just as good as anything I've eaten in Italian coffee bars. The only thing I would do differently is to smooth out the jam before baking, which Nigella says not to do. Mine didn't spread so much, meaning that the crust of my crostata was enormous. To eat, this was superb, but from an aesthetic viewpoint, I would prefer a narrower pastry border.


Make this. It means you get to eat pie for breakfast. How good is that?


Crostata


You will need:


75g butter at room temperature
150g caster sugar
3 eggs
200g plain flour
1 tsp baking powder
zest of 1 lemon
1 jar of your favourite jam (I used homemade blackberry, recipe to follow)

  1. Pre-heat the oven to 180 C. Cream the butter with the sugar until light and fluffy.
  2. Add the eggs, one at a time, and beat well after each addition.
  3. Sift over the flour and baking powder, and fold in to the egg and butter mixture. Lastly, add the lemon zest, and fold it in well.
  4. Using a spoon, spread the dough into your chosen receptacle - a 20cm tart tin, or a Pyrex dish of similar dimensions are perfect for this amount. Leave the edges a little thicker than the centre, to allow for a good crust.
  5. Spoon the jam into the centre of the tart, and spread almost to the edges with a knife.
  6. Bake for 35 minutes, or until lightly browned at the edges. Serve cold, with coffee.

Thursday, 12 August 2010

Pie of the Month - July


I am starting this post with a picture of some tarts from my local patisserie
(yes, we have one in Cathays!). You need to at least see something pretty on here today.

Fail Pies. Bin Pies. Awful Tarts. You can call July's pie whatever you like, just don't attempt to eat them.

Remember this? Well, I am learning from Judy's bravery and coming out with the truth. Just don't judge me, OK? This isn't going to be pretty.

July was a VERY busy month for me. I had no time to bake anything at all, and as a result, there were few blog posts, and no pie of the month. I also didn't get a chance to make Sanjana's lamington recipe for Lamington Day on 21 July, which is doubly awful because I wanted to try making srikhand.

Anyway, I had it all planned out. I was going to make some pandan egg custard tarts, like the ones I always order in Chinese bakeries. Turns out that you need special mini-tart moulds which are shockingly over-priced in Cardiff, so I decided to just wing it with a mini muffin tin I use for mince pies at Christmas. Oh, and to use pre-made puff pastry.

(If this were an episode of Air Crash Investigations, now would be the point at which the narrator chillingly announces that 'Although the flight crew don't yet know it, the seeds of disaster have already been sown...')

I am not even going to give you the recipe. Or talk about this anymore. I am just sorry that I wasted some of my lovely pandan extract and delicious eggs on this rubbish.

Learn from this people. July is not for pie.

But August will have one, and I shall be back next week with macarons!

Adios.


No food styling for these. As if they're fit for anything but the bin. (Actually, we did eat them.)

Wednesday, 30 June 2010

Pie of the Month - June

While baking, caramalised pineapple juices sometimes seep out of these pies.
It is every bit as exciting as it sounds.


(It's getting very close to the end of the month, it really is.)

'Fruit for pudding.' - Surely the most devastating three words to hear in the whole of the English language. They certainly were for me as a child. And even though as an adult I love to eat fruit, I still think that it's no substitute for a proper pudding.

Unless you wrap it in pastry, of course.

Recent discovery: barbequed pineapple is sensational.

Recent realisation: I have never cooked with filo pastry.

(Yes. It's true. We are indeed going to the fabulous place you are imagining.)


I couldn't be bothered to get the BBQ out (and I'm not in the mood to apologise), so I decided that using raw pineapple in these Pineapple Paradise Pies (love me that alliteration) would have to do. It did. Does. Will do. Look me in the eyes and bear witness to my absolute conviction: these are delicious.

3 basic ingredients. A few optional extras. You will celebrate me. Oh yes. You will.

Pineapple Paradise Pies

You will need:

1 ripe (I said RIPE!) pineapple
1 packet fresh filo pastry
50g butter, melted

To serve:

crème fraïche
caster sugar
powdered cinnamon

  1. Pre-heat the oven to 200°C. Peel and slice your pineapple into small-ish chunks.
  2. Take a sheet of filo and cut in half. Brush each half with butter and lay on top of each other. Repeat to create a four-layered piece of filo (do you copy that?).
  3. Arrange a generous portion of pineapple chunks in the centre and fold the edges up to create a neat little pie package.
  4. Place the packages (you should get 6 - my packet of pastry had 12 sheets) on a baking sheet, brush with butter and bake until brown and crisp, around 15 minutes.
  5. Serve sprinkled with sugar and cinnamon, and a generous scoop of crème fraïche.

Monday, 31 May 2010

Pie of the Month - May


I swore when making this here pie that I would never attempt pastry again.

No, that's not a positive way in to this, but it is the truth. I think that making pastry on a baking hot day is anyway only mere steps away from full-blown madness, but I had to otherwise we'd have no pie for May. In addition to the heat, the phone would NOT STOP ringing. Sales calls. Recorded messages. The lot. I thought I was going to have to kill myself when I came back after the last call I bothered to answer (stopping to wipe my hands and de-flour and butter myself, as I had done for each and every one of the other calls) to find that my second batch of pastry (for the pie lid) had dried out in the heat and would not roll out.

Stress pie!

But I didn't. I just ran out to the Co-Op and bought a sheet of puff pastry. I wasn't about to make more of my own shortcrust - far too frustrated for that.

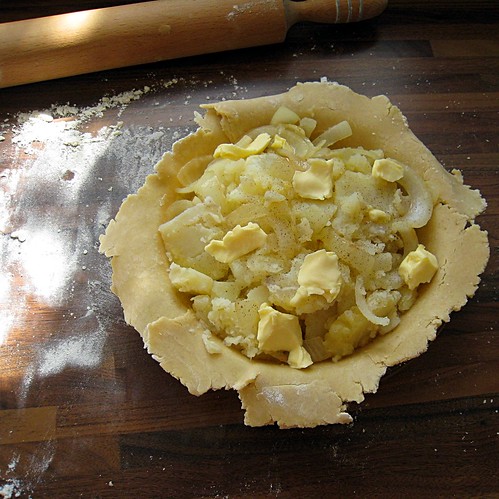
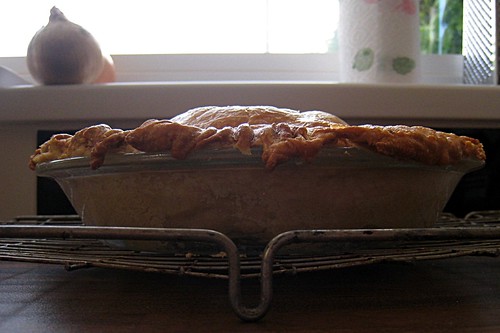
Anyway, this month's pie is a butter pie, special delicacy of the North West of England. Not the bit that I am actually from, but the bit slightly further up where my family had the greengrocers. It's a butter pie!

Butter pie is basically just buttered potatoes and onions baked in pastry. Yup. That's it. I know how that sounds, but just think about how good tortilla is for it's simple savoury goodness, and you're there.


Wikipedia tells us that:

The butter pie is thought to have been created for workers from Lancashire's Catholic community, to consume on days (mainly Friday) when meat could not be eaten. To older generations, they are sometimes known as 'Catholic pies' or 'Friday pies'.


I have never heard them called either of those things, but thankfully, I am not yet a member of 'the older generation'. I've also never seen them served 'on a barm cake', but that would be something special!


Yeah, I've gone white trash now. I keep Trex in the fridge...

I made this recipe up, and I think anyone making a butter pie would just use whatever quantities fit their dishes. I think if I made it again though, I wouldn't bother making the pastry, as although it's traditional to make it with shortcrust, the puff was lovely. And obviously, nobody ever makes that themselves.

Apologies for the poor quality photos. I was stressed in the kitchen for this!

Ee up duck, let's gerron wit' recipe.

Butter Pie

You will need:

shortcrust pastry made with half butter/half Trex or lard (for a short crust, aptly enough), or use bought puff pastry
potatoes
1 onion
butter
salt and pepper

  1. Peel and cut the potatoes into chunks. Boil until just soft; drain.
  2. Fry the chopped onion in plenty of butter. Go slowly, and don't let it brown.
  3. Line a pie dish with pastry.
  4. Layer the potatoes and onions in the lined pie dish. Add LOTS of salt and pepper, and dot with more butter. Be generous.
  5. Use the leftover pastry to make a pie lid. Bake in a 200°C oven until browned and piping hot throughout. Mine took about 45 minutes.
  6. Serve hot or cold, in generous slices.

Thursday, 29 April 2010

Pie of the Month - April

Love.


OK, who thought there wasn't going to be a pie for April?

(Well, my hand is raised.)

Obviously, I take these pies very seriously indeed, for as soon as the kitchen was deemed usable, this was the first thing I rustled up. I would like to add that cleaning the kitchen, all of the downstairs and garden of dust and rubble after the departure of the workmen took all of Saturday and most of Sunday last weekend, hence the slightly more calorific pie content this month; we deserved it. If you have not spent the weekend cleaning and lifting rubble, but still wish to enjoy my pie, I suggest you make your main course a salad.

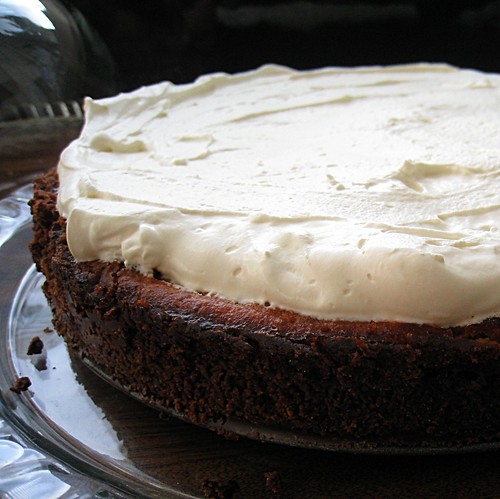
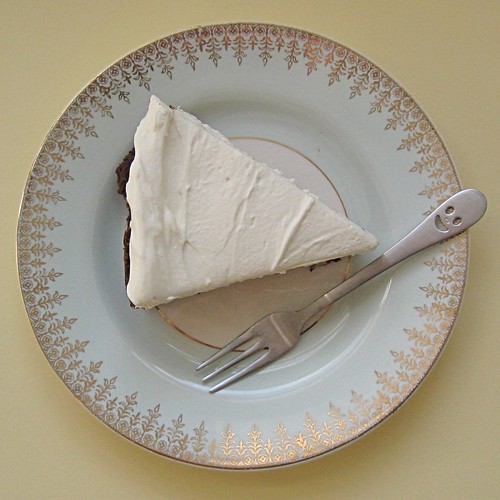
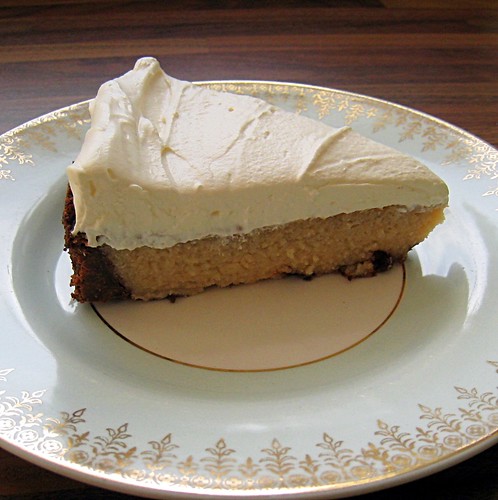
No time to make pastry for this one (which I know was the whole point of the pie series anyway, but let's do a Gordon Brown and just skirt around the issue on this, shall we?), so it is a slight cop-out for April: a biscuit crumb base. However, you mustn't feel too disappointed, because the whole thing is made in the blender (even the whipped cream top), so replace your sadness with glee and appreciation of my proclivity for kitchen appliances and let's make a pie. No need to be a malcontent.


(If you had my blender, you'd feel the same by the way. It's a KitchenAid, and was a gift from my mum and sister years ago - basically the best thing I have ever been given.)

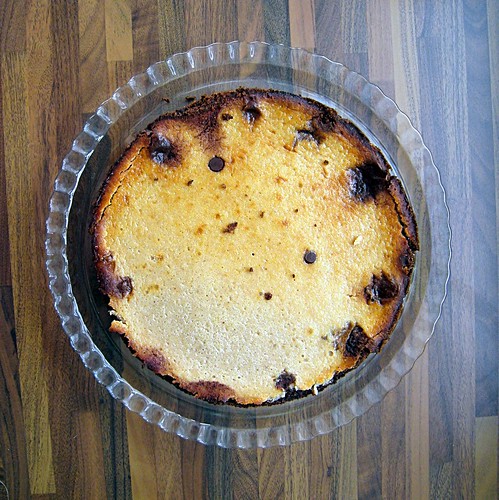
The filling is banana and chocolate, which when baked smells somehow of caramel. I have not figured out why or how that can be the case, but presume there is science involved. Which is strangely appropriate because as April's pie was cooling on the counter, I was catching up on some of my favourite food blogs and noticed that Not So Humble Pie is having a virtual pie contest. So over to you Ms. Humble! Why does my entry (which the pie now is) smell like caramel?


I am unsure as to what to call my mysteriously caramel fragranced creation mind you. Drawn though I am to the alliteration of Mr. P's Bitchin' Baked Banana Blender Pie, my grandma reads this blog from time to time and I wouldn't want her to see my bad language. I am full of admiration for those who brazenly cuss on their blogs (swear words are so expressive!), but I'm reticent to follow suit. So I think it will have to be Mr. P's Bad Language-Free Baked Banana Blender Pie for now. That's not what I'm calling it at home though!

Reasons my Pie of the Month should win the Not So Humble Pie Contest:

  • It is particularly scrumptious, even without swear words;
  • Anybody could make it, even without a blender (see alternate method);
  • Chocolate and banana is always a winning combination;
  • Mr. P likes the idea of winning a mystery prize from Morocco.
Wish me luck! (Unless you also enter the competition. In that case watch your back!*)


*I am joking. Let's all be unified in our appreciation of the pie!


Mr. P's Bad Language-Free Baked Banana Blender Pie

You will need:

250g digestive biscuits
100g butter, melted
2 tbsp cocoa powder

4 bananas
2 eggs
300ml single cream
150g sugar
1 tsp vanilla extract
handful of chocolate chips

300ml double cream
1 tsp vanilla extract

  1. This is easy as pie. In a blender, crush the biscuits until they become crumbs; mix these with the butter and cocoa and press the mixture into a 26cm springform cake tin. Mound the mixture up at the sides, so it becomes more of a pie shell than a base. If you don't have a blender, just bash the biscuits up with something heavy. Or get a blender.
  2. Chill the crumbed mixture base for half an hour or so.
  3. Blend the bananas, eggs, sugar, single cream and vanilla until smooth. Pour this (very liquid) mixture on to the biscuit crumb base, and sprinkle with as many chocolate chips as you like. No blender method: mash the bananas with a fork; add the eggs, sugar, cream and vanilla and mix until smooth.
  4. Bake in a pre-heated oven at 180°C for 40 minutes, until the banana mixture has puffed up and set. (Your kitchen and home will smell unbelievable.)
  5. Cool on a rack, and chill until needed.
  6. Just before serving, whip the cream and vanilla extract (in the blender, or by hand) to soft peaks and use to top your pie.

Tuesday, 30 March 2010

Pie of the Month - March

You never get nice photos if you just photograph your dinner. But we have a rule here not to waste anything, so pies get baked for dinner, and not at four o'clock when the light is good.

And we're back with the series you all wish he'd never started!

This month, I have once again left everything until the last minute, but you can't be mad and point waggly fingers at me, because I am only late posting this. I made it weeks ago! And the good news is that you could make these pies in a flash anyway, so if even I did leave it until the very last second, which I didn't, it still would have been OK. More than OK. Delicious.

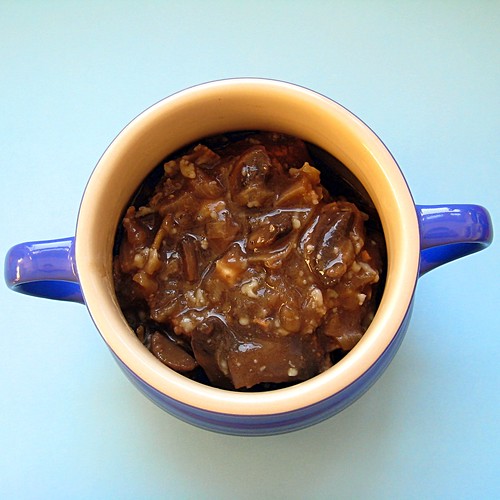
As you've probably already worked out from the (awful) photos, this month, we are bound for Pot Pie Town.

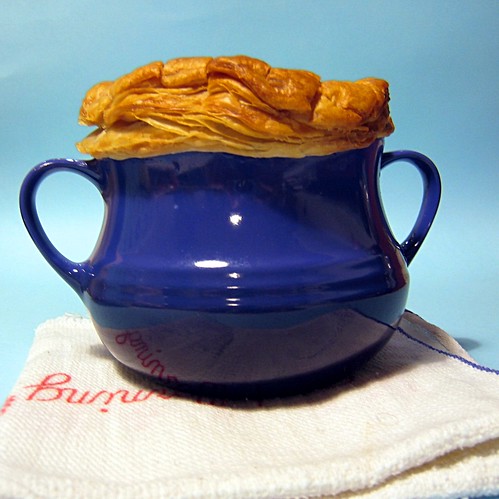
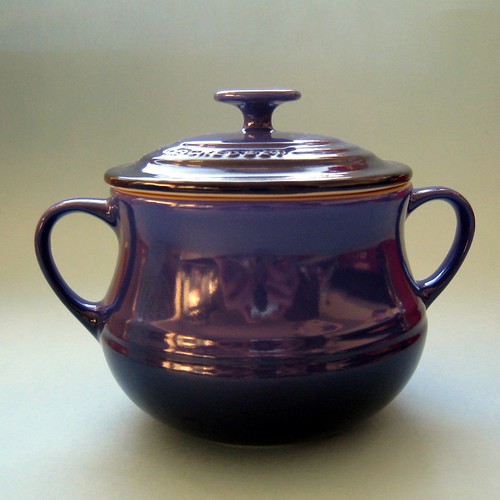
I should say up front that I never would have made pot pies if it weren't for the fact that Lucy and Rish gave us pot pie pie pots as a house warming gift. I don't know if you can make it out in the photos, but they are Le Creuset. I have a complex and difficult to explain relationship with Le Creuset products. I seek them out. I touch them. I admire the myriad of colours they come in (not the orange ones though - surely a case where original is not best), and stare longingly.


Me in the pot. Upside down.

But no matter how desirous I am of the purchase, I never allow myself. Let's face it: they are REALLY expensive. Even the cute little silicon spatulas that say 'Le Creuset' on the handle cost a week's wages. So you can imagine my joy at being the lucky recipient of two blue pie pots. And just for having moved house! I should do that more often. (Obviously that was a joke. I'm not moving ever again, even for Le Creuset. It nearly killed me, it was months ago, and we still have things to unpack.)


Beef brisket was cheap when I was deciding what to fill these little pots with. I guess it always is actually, so don't think these are March-only pies. They are basically pastry topped stew anyway, so you can put whatever you want underneath and I won't mind. Yep. I am giving you free-reign over my pies. Enjoy it.

The pastry itself is puff. The bought kind. I was going to tell you that there's no point making your own, that everybody buys it, and then this happened, literally a day or so after I made my pies. But I still recommend buying your own. It is only shortcrust that you'd be a fool to buy. Homemade not only tastes better, it costs less too. If you're going to buy shortcrust, you may as well just pull a Henry Sugar, and throw twenty pound notes out of the window.


The collar.


Make these. You get enough mixture to make four, and one packet of pastry will do that many tops easily. You could also do just one big pie. Some peas on the side will make it look like you made an effort, except you won't actually have had to.

Beef and Mushroom Pot Pies

You will need:

500g brisket of beef, diced
3 onions
1 carrot
large sprig of rosemary
4 large field mushrooms
salt and pepper
1 can of Guinness, or other stout
1 tbsp flour

bought puff pastry

  1. Dice the peeled onions, and cook in a little oil over a medium heat, with a pinch of salt, for about ten minutes. Add the chopped carrot, and cook for five minutes more.
  2. Add the needles from the rosemary, stir, and add the beef, flour and some more salt and pepper. Then tear up the mushrooms, and add them as well.
  3. Pour over the stout, and simmer the mixture for an hour or so over a low heat. You can leave the stew at this point, covered in the fridge, for a day or so.
  4. Ladle some stew into your pie pots.
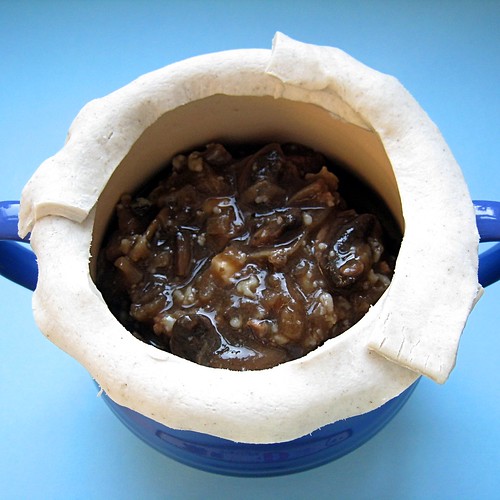
  5. Roll out the puff pastry, and cut circles to top the pot with (hint: use the lid as a guide!). Also cut a collar of pastry to attach to the pot - this gives the lid something to cling to. We all need that.
  6. Bake at 200°C for twenty five minutes, or until the pastry is puffed up, and golden.
  7. Serve with green peas.

Sunday, 28 February 2010

Pie of the Month - February

Whenever I make a pie like this, I look at my ring finger and think, 'Why isn't there a ring on it?'

Did I really say I would bake a pie every month for 12 months? I did, didn't I? Well, that's OK. I reserve the right for it to be a last day of the month rush if necessary; I can do what I like.

I have an awful feeling that I promised 'process photos' last time. In fact, I know it to be the case. Listen, sometimes I make false promises. I'm sorry! They haven't materialised. I'm not passing the blame, but my erstwhile assistant photographer went cycling with the boys yesterday, and I wasn't about to spend my whole morning rubbing fat into flour, stopping to wash my hands, taking a few pictures and then repeating the whole process. No sirree. That's just not how I roll.

Now. Let's talk about this pie, which as I type hurriedly, I am munching on a slice of (and very good it is, too). I completely intended to make this month's Pie of the Month a recipe from Barbara Swell's book, but I got sidetracked while flicking through a copy of this one. If you also have a copy, I'm sure you have the same dilemma - it is particularly greed inducing, and I am right now trying to come up with a way to get meatloaf onto this week's dinner menu.

(We don't actually have a dinner menu chez P. I believe that's called speaking figuratively. Sorry if you feel deceived.)


The recipe that caught my eye was for Raisin Pie. I loved the idea of such a simple filling (raisins, lemon, nuts and sugar), and given that the weather is as yet far from Spring-like, I thought it would seem quite seasonal. But when it came to making it, I realised I didn't have all of the ingredients to hand, and wasn't in the mood for shopping. So I allowed myself a little leeway, and made up my own, even simpler filling. No lemon? Use an orange - you know, the old one that's been in the fruit bowl forever. No nuts? Leave them out. Not quite enough sugar? Just use a jar of marmalade instead.

You can see I was quite relaxed about the whole thing. And not just with the ingredients.


Have I told you of my dilemma with photos? I can never decide which I like best.

Everyone always says that you need cold hands when you make pastry, and that you should roll it out on a chilled surface. I think they mean a marble board when they say that mind you, because I don't see how you'd get a kitchen counter into the fridge.

I think we all of us ignore the marble board trick, because let's face it, none of us actually have one. But the cold hands thing really irks me. Some cooks actually go as far as to recommend you hold your hands in a sinkful of cold water before starting to make pastry. If you have actually done this yourself, well then I'd recommend you to throw that recipe out straight away, because quite frankly darling, that isn't a cookbook you have in your possession, but a torture manual.

I mean, come on.

For the record, I just use my hands at whatever temperature they are, and I roll on the sideboard (well floured, obviously). I'm no grand master or anything, but so far, my pies have turned out fine.

Oh, and I shocked myself this time by using, instead of butter, a vegetable margarine called 'Stork - Perfect for Pastry'. And let me tell you - the name is a good one. This beats any all-butter shortcrust I have ever turned out, though I hate to admit it because it seems so low rent.

So I use them all - even though some have different backgrounds and lighting.

I have done so though; honesty is the best policy and all that. You can use all butter in yours, I won't tell.

Orange Raisin Pie

You will need:

250g plain flour
125g butter (or Stork!)
1 orange, juiced

250g raisins
1 jar marmalade
pinch cinnamon

  1. Make your pastry first; cut the fat into the flour, and using your fingertips, rub the two together. Stop when the mixture looks like breadcrumbs.
  2. Add orange juice, a little at a time, forking it through, until the mixture just comes together. I used half the orange juice - you might need more. I believe I have already demonstrated to you that I don't believe in the science of pastry - just wing it, it will be fine!
  3. Use your hands to form the pastry into two disks, wrap in clingfilm and chill for twenty minutes, or longer if that suits.
  4. Make the filling: put everything else into a saucepan, along with the remaining orange juice, and heat, letting the mix simmer for 5 minutes.
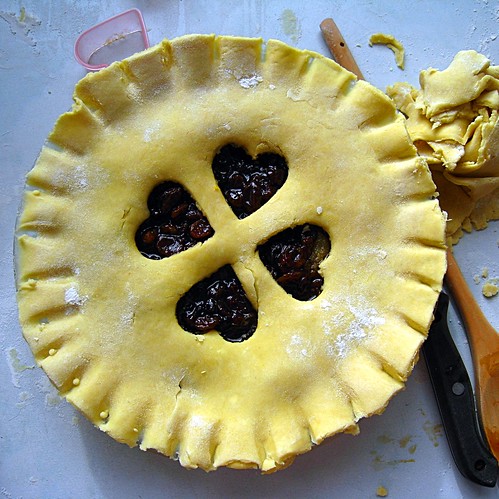
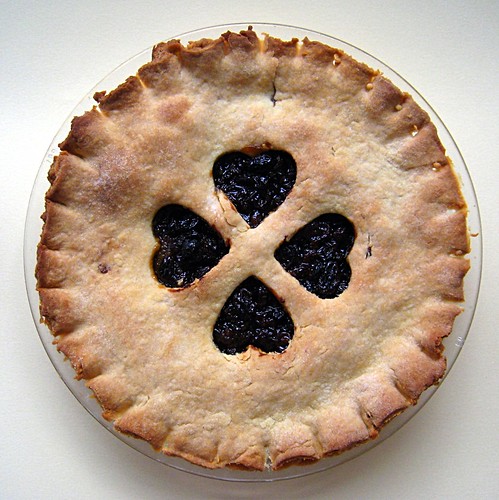
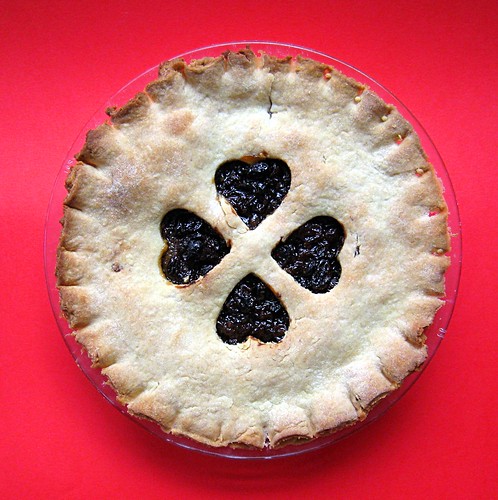
  5. Get the pastry out of the fridge, and roll out the disks. Use one to line your pie dish (20cm), and the other to form the pie lid. I cut heart shapes out of the top to resemble a pie I remember from an illustrated book we had when I was little (the ones where you had to find the little yellow duck in each picture), but a few knife slits will do the job just as well.
  6. Bake at 200°C until done, which for me, was about 40 minutes.

I just wouldn't like feeling that I used the wrong one.

Sunday, 31 January 2010

Pie of the Month - January


January's pie was brought to you by the flavours of sage, onion and thyme.

Embarking on a 10-day Re-Inventing the Lamington Challenge is one way to ensure that you don't really have time to think about anything much other than lamingtons, and so as a result, I haven't really. No regrets, mind, I'm just pointing it out.

But actually, at the end of December, I was full of ideas that weren't related to day-old cubes of cake, chocolate ganache and coconut shavings at all; I was thinking about pie.


As it turns out, my No-Death-Required inheritance of a pie dish was indeed a timely occurrence, for come Christmas, I was lucky enough to be given a copy of this book:


Thanks Lucy and Rich!

And that was it. In one fell swoop, my short to medium term future plan was laid out in front of me, reaching out into the distant ether, as if hand-woven in the silvery threads of destiny...

Reader: 2010 was going to be the year of the pie.

Now. I don't really make pastry or pie that often, and when I do, it's usually a simple short crust, and I get Mr. Other P to do all the donkey work (mostly because he quite enjoys it, and I can just stand beside him barking orders and wiping up the mess). But I realised, upon reading The Lost Art of Pie Making, that if I set myself the task of making at least (at least!) one pie a month for a year, then by the end of it, maybe it would be me who was enjoying rubbing the fat into the flour and not him.*

And so it begins. Though strangely enough, not with a recipe from the book that inspired it, though lots of those pies are going to be featured over the course of the year. Some of them have historical connections, and I have never been someone who can resist a meal with a story.


Squished together, this looked somewhat less appealing.

No, January's pie is all of my own creation. It's a sausagemeat pie, plain and simple, only instead of making regular shortcrust, I decided to branch out. Don't worry though, I didn't go too crazy; it's only rich shortcrust.

Rich shortcrust (said the non-expert), is just like normal shortcrust pastry, except bound with egg yolk instead of water. It seems to make a shinier, mealier crust. But you won't be able to tell that because these pictures were taken at the start of January, in awful, dull, wintry light, and a freezing cold kitchen. In fact, they are so bad that I wanted to bake this pie again, just to re-photograph it. But it's 31 January today, which means that if I don't post it now, January will be without a pie. And I refuse point blank to let that happen, not for nobody and no how.

Next time, I promise to have 'process' photos. The ones I took for this were just too bad to be seen, and you deserve better. But for now, let us be content with these cobbled together shots; they are all we have.

*I was considering calling this series Learning To Love Your Nailbrush.


He may not look it in dull winter colours, and with the light on, but this pie was beautiful.


Sausagemeat Pie with Herbs


You will need:

250g plain flour
125g cold butter, cut into cubes
1 egg yolk
pinch of salt
iced water as needed

6 pork sausages (good ones!)
1 onion, grated
1 egg
2 slices bread, crusts removed
12 sage leaves
leaves from a large sprig of thyme
salt and pepper

  1. Make the rich shortcrust: rub the fat into the flour, and when the mixture looks like breadcrumbs, stop. Add salt, and the egg yolk. It should come together and form a ball; add a little iced water if it needs help. Wrap in clingfilm, and chill in the fridge for at least twenty minutes.
  2. Preheat the oven to 200°C. Mix the filling ingredients together in a large bowl.
  3. Roll out half the pastry, and line the pie dish. Add the filling.
  4. Roll out remaining pastry, and use as a lid for the pie. Seal the edges using a fork.
  5. Make a slit on the top of the pie with a sharp knife (to allow steam to escape), and bake for about 40 minutes.
  6. Serve hot, or cold. However you eat it it's good; however you look at the photos, they're bad.
Related Posts with Thumbnails