Home About The Fame! Contact

Tuesday 28 December 2010

Pie of the Month - December


Sometimes, having a blog feels like having homework. Setting yourself the task of making a pie every month is one way to ensure it does. I will not be making pie so regularly in 2011.

No(pie)vember excluded, I have done all right, I suppose. Some months I was late with my assignments, and other months I got ahead and posted early. What did I learn from the whole experience?

Well, this is going to upset some readers, but it needs to be said. So get get ready.

I don't want to talk about the potatoes.

Pie is not that great. It's OK, but nobody is ever blown away by it. Ever. You can bake a cake, cook a steak, make jams or chutneys or even turn out a batch of home-made sweets and people will be infinitely more impressed than if you made perfect pastry and filled it with something delicious. It should not be this way, since all of the above involve considerably less time and effort than making a pie does, but sadly, I have found it to be so.

Sorry to upset you all.

I can try to lighten the mood by giving you a recipe for perfect short-crust pastry this time. It is the result of my year long pie project, and I hope making it will make you feel as if it was all worth it. Not that it was you who had to do it, mind.

Has the experience of pie making changed me? Well, no. I still get Mr. Other P to make the pastry whenever I need it. But I made all the pastry for the pies you see on here (save this month's mince pies, actually, but let's not obsess), and I did learn to love my nail brush in 2010.

You can see all the Pies of the Month here. There's no pie for November, but I have over the year made more pies than the ones I posted anyway so you can just imagine something that took lots of effort and went largely unappreciated. For 'tis the way of the pie after all.

This is my last post for 2010. There should have been more. When life gets busy, the blog suffers and I feel bad about it. But make sure you all come back next year. We're doing lamingtons again!

Have a Happy and Joyous New Year!

(Don't do anything stupid like going on a pie mission!)

Mr. P's Shortcrust

You will need:

250g cold butter, diced
500g plain flour
2 eggs

  1. Rub the cold fat into the flour. Stop when you have a crumby looking mixture, and can no longer bear to rub fat and flour together between your finger tips. The latter will probably happen first, so push yourself a little. You can do this.
  2. Beat the eggs lightly and stir into the crumb mixture to make a dough-like pastry.
  3. Form the mixture into a couple of balls, wrap in cling and chill until needed.
  4. Roll out on a floured surface and use as you wish. This amount makes enough pastry for 24 medium sized mince pies, or one double crusted large pie. Bake the pastry at 200°C until golden brown and crisp.

Thursday 16 December 2010

Pumpkin Carrot Cake Cupcakes

I am not a carrot cake.

People tell you that carrot cake was invented to use up gluts of carrots. I don't know if that is true or not (and we'll never know), but I figured that since I didn't have any carrots in the house recently, I could substitute a pumpkin and still get away with it. We had three lined up on the kitchen window sill, see, and I was worried I would have to dust them if they stayed around much longer.

I do dust. But not squashes.

As it happened, I didn't walk away from the experience entirely free of regret (I mean, have you ever tried grating a whole pumpkin with a box grater? Well, don't.), but that's fine; I take immense pleasure in celebrating my autocracy.

'I decide, OK? I say who, I say when... I say... WHO!'

(Name the film for five bonus cool points. In fact, it's nearly Christmas; make it ten.)

Flavour wise, though, pumpkin was a good choice. As was following Rose's recipe. Have I ever made so many recipes from a single volume? I doubt it. They should call her 'The Cake Lady', if they don't already.

Recently I was delighted to be proven right when I said that I thought a cookie recipe I posted would be one people actually got up and made, and I think this cake should have the same effect. I know a lot of people have carrot cake recipes that they think are 'the ultimate', the 'ne plus ultra', the 'best', and so on and so forth, and to them I say this:

'You are wrong'.

For until you've added cocoa to the batter mix (and, let's face it, changed the carrots for pumpkin), well, basically you just don't know. So there.

I made one full quantity of Rose's recipe and was delighted to find that it made enough for me to make one big cake to take home to the family for the weekend (12+ servings), and a tray of 12 cupcakes to freeze for later. It's what I'd call an investment.

If you're visiting family this weekend, and have a sister like mine (who basically tells me not to bother coming if I'm not bringing cake), I recommend you seek out that box grater and get the oven on.


Classic Carrot Cake (but without carrots!)
adapted from Rose's Heavenly Cakes

300g plain flour
1 1/2 tsp baking powder
1 tsp bicarbonate of soda
1 tsp salt
1 tbsp cocoa powder
2 tsp cinnamon
300g caster sugar
100g soft brown sugar
315ml vegetable oil
4 large eggs
2 tsp vanilla extract
450g grated carrots or pumpkin (unpeeled)

  1. Pre-heat the oven to 180°C and grease and line 2 x 24cm cake tins, or make one cake that size and use a 12 hole muffin tin for the rest of the mixture.
  2. In a large bowl, place the flour, salt, bicarb, baking powder, cocoa, cinnamon and sugars and mix gently together with a wire whisk to ensure the leavenings are evenly distributed.
  3. In another bowl, mix the oil, eggs and vanilla. Add the wet ingredients to the dry, and mix thoroughly. Then fold in the pumpkin (or carrots), and divide the batter amongst the tins.
  4. Bake for about 45 minutes, or until a toothpick inserted into the centre of the cake comes out clean and free of crumbs. The cupcakes will take about 30 minutes only.
  5. Frost the cakes when cool with white chocolate cream cheese frosting. Remember to lick the bowl.

Friday 10 December 2010

Christmas Macarons


Who got rather carried away with the Christmas theme when photographing today's macarons?

Nobody. I see nothing over-the-top whatsoever about these photos. What do you mean?

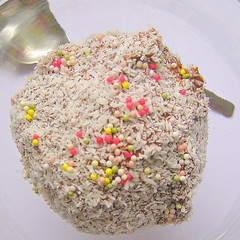
For once, not having light in the kitchen was a blessing; my macs look
better since you can't see them so well! Curse those lumpy shells!


Well, it is almost Christmas time again and that can only mean one thing at Delicious Delicious Delicious: it's also Kewpie time. For all ye faithful that were here last time, you'll know exactly what I mean. For any newbies, I should like to refer you here. Expect some kitsch.

Today's post is going to embarrass me, and not just because it features naked from the waist down Kewpies. No, it's going to show me to be a fool who doesn't do his research properly. Fortunately however, this fool who doesn't do his research properly is able to make super-delicious Orange and Clove-Scented Macarons for the festive season. So I give my permission to all of you reading to laugh heartily at my woeful ineptitude. I won't even notice - I'll be enjoying tea and macarons.


I love this photo, despite it being out of focus. Why aren't all macarons topped with bears?

Today's post, you see, is my entry for the 'Most Wanted Yule-Blog Bake Off Challenge'. Yep, never one to turn down a food-related contest (I dream of entering a Pie Eating one, but so far haven't seen any happening in South Wales), and always ready to receive John Lewis vouchers, I got straight into the kitchen upon hearing about the competition.

Entrants are supposed to come up with a recipe that really epitomizes Christmas. I know I may be pushing it with macarons, which are not considered even remotely Christmassy in the normal run of things, but hear me out: I love making edible gifts at this time of year, and macarons are perfect for that. They are sweet and luxurious (admit it: you'd never make them for yourself); they last a good week in the fridge (so you can make them ahead); they are easy to package prettily (have you ever tried wrapping a bottle of wine?) and can be flavoured in countless ways.


There. I have made my case for the macaron. If you're with me, we'll carry on.

My family used to run a greengrocers. Christmas means citrus to us. Oranges, clementines, the works. When I think of Christmas, I think of mounds of fresh-smelling fruits and netting machines (that always broke and meant we had to tie the red mesh bags by hand: lovely). It would be wrong for me not to have oranges in any Christmas recipe I created.


So, having chosen orange as the main player for my macarons, I needed a partner flavour. Vanilla has been dealt with here before, and frankly, I am rationing it since those exotic beans are becoming prohibitively expensive! So, looking for inspiration, I flung open my cupboards and went for clove. It seemed seasonal, and I even managed to convince myself that cloves were what some children in my school had pressed into oranges for their Christingle Services and brought in to show the rest of us, the Non-Believers. 'How Christmassy,' I thought, while making the macarons' filling.'The vouchers are mine.'

Pride before a fall, readers, pride before a fall...

How devastated I was just now to find that a Christingle hasn't got any cloves on it at all, but instead ribbons and dried fruits. Turns out what I had always thought was a Christingle is in fact a pomander.

I feel like such a Christmas fraud. I did say I was a Non-Believer...

But give me a chance! Or, at least make my Foolish Macarons. A couple stashed in a jar or little box would be the best present ever, and if you package them in bags of five, you'll get three gifts for the special people in your life out of this recipe, and all in a little under 35 minutes in the kitchen.

Orange and Clove-Scented Macarons

You will need:

2 large egg whites (that's about 60g)
40g caster sugar
110g icing sugar
50g ground almonds
finely grated zest of 1 orange
50g white chocolate
50g cream cheese
1/4 tsp ground cloves
a small dap of orange food colour gel (optional)
  1. First of all, age your egg whites. This means leaving them in a bowl, uncovered, in the fridge or on the kitchen counter over night. I know the Health and Safety-types will hate the idea of doing such a thing, but trust me.
  2. Next day, whisk the egg whites until soft peaks form. Add the caster sugar and food colouring gel, if using, and beat until you have a stiff peaking mixture.
  3. Sift over the icing sugar and almonds, and add the orange zest. Now fold everything together until you have a smooth batter that 'flows like lava'. I hate this description. Basically, fold the almonds and sugar into the mixture as you would flour into a cake batter. It takes me 50-60 fold to get the right texture. See my other macaron posts for more details. Even if you over- or under-fold the batter, you'll get macarons if you weighed accurately. The folding just determines the texture and appearance of the finished shells.
  4. Transfer the mixture to a piping bag fitted with a plain round tip of about 1cm in diameter. Line a baking sheet with parchment, and pipe rounds of batter. You should get about thirty £2 coin sized blobs from this much mixture.
  5. Bake at 150°C for 11 minutes and cool the shells on the baking sheet. When completely cold, remove and sandwich with a teaspoonful of the filling.
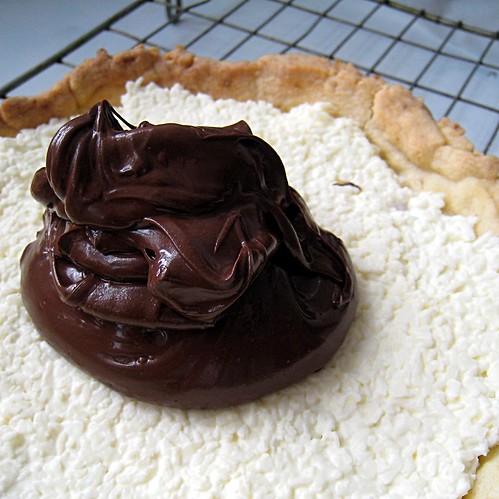
  6. The filling is simple: melt the white chocolate, cool slightly and add the cloves. Then stir in the cream cheese until smooth. You could make a white chocolate ganache, which would be fancier, but the cream cheese filling, though untraditional, is moisture-rich. This means that during storage, the texture of your macarons will improve.

Thursday 25 November 2010

Chocolate, Cinnamon and Peanut Butter Cookies


I never know for sure, because it's very hard to tell at the outset, but I think that this may be one of the recipes that someone will read here and then actually go off and make. If you're feeling like you might be that person, well, I invite you to scroll down: the picture of the dough is going to seal the deal.

After Monday's biscotti, I am pleased to be posting another biscuit recipe. Sometimes you need something easy and simple to be getting on with, and that's why I like cookies. Nothing taxing about making them, and you get to have a full biscuit jar. It's win-win.

Nigella Lawson once said that making biscuits always seems like the sort of cooking that somebody else does, and I know what she means, up to a point. But when you do get around to it (and I say this with absolute conviction), you always wonder why you don't do it more often, and what has been keeping you from doing it sooner. It's exactly the same feeling as the one I get when I listen to old Neneh Cherry records.

(I find that analogy to be particularly pleasing.)

See what I mean? You are so going to make these.

Now, why these cookies are so sensational is that you don't have to bake them all in one go. It's not that you can't (but don't eat them all in one go, please), but that the dough, when portioned and shaped into squidgy mounds, can be frozen. For ages. You can then bake the frozen dough balls straight from the freezer, and so never be more than twenty minutes away from freshly baked cookies. This is, in fact, what Lucinda Scala Quinn, editorial director of food and entertaining for Martha Stewart Living does, so as to have fresh cookies on hand for 'casual get-togethers'.

'Casual get-togethers'? Lucinda - I want an invitation!

I may well end up making these as Christmas gifts actually. I quite like the idea of giving them out, packaged in their frozen state. You get so much sugary stuff around the festive season that it would be quite cool to give someone a batch of biscuits they can bake when they want, instead of watching them stale in a prettily ribboned jar.

Just a thought.


Chocolate, Cinnamon and Peanut Butter Cookies
adapted from Cookies

You will need:

2 cups plain flour
1 tsp bicarbonate of soda
1 tsp salt
1 tsp ground cinnamon
175g butter, at room temperature
1/2 cup peanut butter
1 cup soft brown sugar
1/2 cup granulated sugar
2 eggs
1 1/2 cups chocolate chips
2/3 cup chopped salted peanuts
2 tsp vanilla extract

  1. Heat oven to 180°C, and line a baking sheet with parchment.
  2. Whisk together flour, salt, bicarb. and cinnamon in a bowl.
  3. Cream the butter, peanut butter and sugars together until smooth and combined. Beat in eggs and vanilla, followed by the dry ingredients. Mix to a smooth dough.
  4. Fold in nuts and chips; refrigerate for at least 15 minutes.
  5. Use an ice-cream scoop to make balls of dough; place balls onto lined baking sheet, well spaced. Bake for 12 minutes, then cool on a wire rack.

Monday 22 November 2010

Cantucci di Prato

Or Canticci di Pietro, if you'll allow me...

It is that time of the year when everyone starts talking about what edible Christmas treats they are making to give away, and the food blogs run wild with suggestions. Not all food blogs mind; I seem to have hardly posted at all recently, which I feel not quite bad about, but not 100% at ease with either. I have cooked for the blog, it's just that people keep eating the food before I can get a picture of any reasonable quality. And you know what low standards I have when it comes to the photos.

Thus my coq au vin will have be remade (the hardship!), as will the clafoutis (ditto) and the various cakes that never quite made it. I might wait a while for the first two though, based purely on the amount of butter that went into them. We had friends over, so it was fine, but making Julia Child recipes for just the two of us might lead to considerable weight gain, given my already-with-us-for-the-long-haul penchant for the sweet and sticky.

That reminds me: I have been saying I'll make these cinnamon rolls all year and need to get on it.

I believe I promised some Italian recipes after having been to visit Bob and Francesco in September. True slacker that I am, I haven't posted any until today, and even worse for those who want a traditional recipe, I have actually bastardised one quite awfully here. I am not going to apologise, but am going to say that they contain Brazil nuts, oranges and cinnamon, so calm down, missus, it's still all good.

As far as I am aware, Julia Child never wrote a recipe for biscotti, and she certainly never made this one, since it has no butter in it whatsoever. But I have noticed that lots of American bakers do add butter to their dough; this is so wrong. Stop it, I beg of you. The whole point of biscotti is that you dry the shizzle out of them, so adding butter is pointless.

True Cantucci di Prato contain aniseed and almonds. My biscotti have neither, because I have no desire to be that person who buys ingredients for absolutely every recipe he tries anymore. I don't have the shelf space, the time or the money. Also: Brazil nuts. Do you really want almonds instead? Didn't think so.

Some years ago I made a jar of Christmas biscotti for each family that makes up my extended family, thinking they would be a nice gift. It was an act of madness (12 jars), and will never be repeated, or at least, not without using smaller jars. However, should you wish to make these for Christmas gifts, know that:

  • they will last for ages, so you could make them now, and stash away for next month;
  • they are quite an economical gift to make so long as you use cheap packaging (basically, don't use big, expensive IKEA jars that hold an entire batch, unless you're only making them for one person) - cellophane bags would be great;
  • you can add whatever nuts and dried fruits you have in the cupboards.


Mr. P's Brazil Nut and Orange Biscotti

You will need:

300g plain flour
200g granulated sugar
100g Brazil nuts
3 eggs
zest of 1 orange
1 tsp vanilla
1 tsp cinnamon
1 tsp bicarbonate of soda
a pinch of salt

  1. In a large bowl, stir together the flour, sugar, salt, bicarb, orange zest and nuts.
  2. Break in two of the eggs, and using your hands (keep one clean and outside the bowl, in case you need to answer the phone!), mix carefully to a dough. You can add milk if everything looks dry, but it should be fine. Take your time, and mix well.
  3. Form three small baguette shapes from the dough, each the width of two fingers. Put the dough baguettes on a parchment lined baking sheet and brush with the well beaten thrid egg.
  4. Bake for 15 minutes at 190°C, then remove from the oven and slice the baguettes into biscotti. Bake the slices for another 5 minutes in the oven on the baking sheet, then turn them over and bake again on the other side for 5 minutes.
  5. Cool on a wire rack. Store airtight.

Monday 15 November 2010

Lemon and Honey Jelly Bundt

Taking pictures in a dark, November kitchen is hard. Don't hate on my bundt!

There are several reasons why you need to make this jelly bundt. Because I am literally typing as I think them up, I'm going to use everyone's favourite, the bullet point, as a way of listing them rather numbering them, mainly because I don't yet know how many I'll come up with (I know - the suspense! Hold on, readers!).

  • On the other side of the Atlantic (or Pacific, depending on where you are), it is National Bundt Day today. We have celebrated this before on Delicious Delicious Delicious.
  • It is vegan, which I always think is nice. Nothing had to die for us to enjoy it.
  • It smells and tastes like lemon jelly beans. That's a really good reason by the way.
Last year, Mary the Food Librarian posted a different bundt recipe every day for thirty days in the run-up to National Bundt Day. Some would call her crazy to attempt such a feat, but Mary did it and this year she's been doing it again. If you do your maths correctly, you'll see that that means she's made 60 different bundts over the last year or so. This is the reason I love her blog: she loves cake even more than I do.


Last year, Mary shocked the hell out of me by making a jelly bundt, so this year I am following her example. It makes sense; I didn't have time to bake last night, so decided to channel my inner Bompas & Parr and go gelatinous. What can I say, it has been a triumph.

I used some agar crystals for this which, unbeknownst to me, were yellow coloured. If you get plain ones, or use animal gelatine, your jelly will have the beautiful, pale yellow honey tones that I wanted for mine. For today though, we're putting the sexy back into artificial food colouring.

I'm not promising anything, because I have a habit of making promises I can't keep (promising, for example, not to open the first bag of pfeffernüsse we bought from Wally's Deli this year until Mr. Other P came home), but there may well be another bundt from me this week.


Happy Bundt Day!

Lemon and Honey Jelly Bundt

You will need:

agar jelly crystals (see recipe)
2 lemons
sugar
honey
water

  1. First, measure the capacity of your bundt tin. Mine was 1 litre. Then, buy sufficient agar crystals to make a double strength solution in a quantity that will fit your tin. My crystals made 1 litre per packet, so I used 2 packets. Make sense? You want a strong jelly that will be easily unmoulded, hence the doubling up.
  2. Zest and squeeze the lemons; put the juice and zest into a pan with enough water to make 1 litre of liquid, 125g honey and 250g sugar (you want sugar equal to a quarter of the liquid, and half that amount of honey). Heat gently.
  3. When the sugar has dissolved, add the agar. Bring to the boil and then pout into your oiled bundt tin. By 'oiled', I mean rubbed out with a little oil soaked kitchen towel.
  4. Chill until set. The jelly will be easier to unmould if you let the tin sit in a basin of hot water for 30 seconds or so.
  5. Let joy be unconfined.

Thursday 28 October 2010

Pie of the Month - October

Caramel drips. MY GOD!

Orange and vanilla are like good friends who don't make enough effort. They get lazy and don't make time to call each other, and sometimes you'll find one of them out by themselves and wonder why they didn't invite the other.

It's best not to get involved at times like that. If orange asks you if you saw vanilla at dessert the other day, my advice is to lie and say you were at home making a fruit salad. They'd only be mad at each other for a minute, and then somehow the flavour tables would turn and it would be you in the dog house. They really do care about each other underneath it all, you see.

Whenever they do make the effort to get together, though, it is easy to see why. Orange and vanilla, when paired, is the most perfect, heavenly (I've been reading Rose) combination in the whole wide world. This is a fact.

Should you be someone who has never actually witnessed their union: you have missed out. I suggest you mix a drop or two of real vanilla extract into your next glass of orange juice. And have it over ice; may as well make it a party. You'll feel like you're in Tahiti. Promise.

You could also make these tarts, which I have lovingly adapted from Jamie's 30-Minute Meals. I spoke of my new found fondness for Mr. O last time, so I don't need to enter into all that again here. But I do need to defend myself for not making my own pastry yet again.

Who are you calling a tart?

Pie of the Month is supposed to be about me getting to grips with pastry art. I don't really seem to be doing it. In fact, I actually am starting to think that it's not really worth making your own pastry at all, since what you can buy is so good. Don't tell anybody I said that though, for I have an image to maintain.

Jamie says it's fine to use bought puff for these Portuguese tarts though, so that's what I am doing. No point making your own if you're only going to bastardize it with a cinnamon swirl anyway!

Until Jamie, I didn't know that Portugal was famous for it's tarts. I am now feeling a trip to Lisbon may be on the cards. Maybe after I've paid for the new bathroom...

Portuguese Custard Tarts
adapted from Jamie's 30-Minute Meals


You will need:

1 packet ready rolled puff pastry
1 tbsp ground cinnamon
1 egg
125ml crème fraïche
125g sugar
1 orange
1 tsp real vanilla extract

  1. Sprinkle the puff pastry with the cinnamon, and quickly roll up, starting at the long end. I hope that makes sense - think Swiss roll.
  2. Cut the roll of cinnamoned pastry into six equal portions, and flatten then squash each portion into the holes of a 12-bun muffin tray. Bake for 8-10 minutes at 190°C.
  3. While the pastry is in the oven, mix the crème fraïche, egg, 25g sugar, vanilla and zest of an orange together. This will be the filling for your custard tarts.
  4. Take the pastry out of the oven. It will have puffed up; press it back down with the back of a spoon so as to make space for the custard. Fill the pastry cases with custard, and bake for 15 minutes more.
  5. When set, remove the tarts from the oven, and immediately transfer to a wire rack to cool slightly.
  6. Make the caramel: put 100g sugar and the juice from the orange in a saucepan and heat until they turn to a bubbling caramel. Spoon caramel over each tart and allow to cool. Delicious!

Monday 25 October 2010

Chocolate Fondants

I dislike seeing my hands in these pictures.

The other day we had friends over to watch La Vie en Rose, the Edith Piaf bi-opic. It was devastating.

I didn't really know much about her before watching the film, and to be honest, I still feel like I don't. None of us could bear how horrendous her life seemed, or how ill she always looked (on screen at least), and I think it's also fair to say we all made silent promises to ourselves to make more effort with posture. I have been known to bark harshly at others before wedding photos are taken that 'You only get one shot!', and ' Posture above all else!', but this film really made me straighten my back.


He looks a little plain on the top, but dig a little deeper and you'll find gold.


And yet... as I type this, I am remembering the film quite fondly: the music was fabulous; the ending very poignant; and for all the dark bleakness of the main film, it made for good viewing. Especially with my chocolate, cinnamon and peanut butter cookies which are coming up next.

But today we have melting chocolate fondants, as promised in my post on illegal ice-cream. They are adapted from the recipe given for chocolate pots in Nigella Lawson's seminal How to Eat, but I think melting chocolate fondants better describes what they are, so I have renamed them so.

I don't mean to insult by the comparison, but I think these fondants are rather Piaf-esque. They look a little awkward, and seem a little uncomfortable when thrust into the spotlight, but give them a chance and they'll blow you away.


They are lusciously chocolatey, rich and sweet. I don't think I'd bother with the ice-cream next time though. Some cold pouring cream would be just as good, and I even snaffled down the one you see here without any accompaniment whatsoever. Et non, je regrette rien.

Annoyingly, you need ramekins. But if you feel like taking risks, you could use teacups in a water bath.

Melting Chocolate Fondants
adapted from How to Eat
You will need:

125g dark chocolate
125g butter
3 eggs
150g sugar
3 tbsp flour

  1. Melt the chocolate and butter together, then beat in everything else.
  2. Pour into ramekins - I got 8 in all, but if you have bigger dishes, you might only make 6. Chill until needed - they will sit happily in the fridge for a few days,
  3. Heat the oven to 200°C, and bake the fondants on a baking tray for 10 minutes only. Give them just 8 if you like really gooey chocolate puddings.
  4. Serve immediately, with cream, ice-cream or nothing at all.

Monday 18 October 2010

Pie of the Month - September

Ugly tarts need love too.


I know, I know. There was no pie in September. I'm not going to patronise you and say that I feel bad about it, because frankly, I had a fabulous September on holiday in Italy and was too busy having a good time to worry about pastry.

It is now the latter half of October and I still don't feel bad about having not made a pie last month, because all this cooler weather we seem to be having makes me feel fine about making two this month. Hurrah for cold, dry days - the sort of weather that makes you feel good about turning out a dozen frangipane tarts and eating them all in one go.

You have read correctly: eating them all in one go. Whilst I do not advise snaffling them down if it's just you, for three or four of you, it's fine.


Enough pie, time for a little provenance: I have a bit of an anti-Jamie Oliver thing. It's complicated, long-standing and deep rooted (all the best things in life are, dear), and I am not going to go into it here because I do have admiration for the chap (School Dinner Champion! Where was he when I was in school?), and am not into public mud slinging. Come over for an ale sometime, I'll tell you all about it.

Anyway, his new series and book has made me look at him in a new way. The man makes whole 4 course meals in 30 minutes! It is amazing; I am in awe.

I figured he might me able to help me out with my pie difficulties, and wasn't disappointed - there is plenty of pastry in this book. I made my own tart cases but he suggests buying them in. Whatever; these are 30 minute frangipane tarts: don't get het up.


I should tell you though, just so you do not think we are returning to the days of bin tarts... I made two piles of the tartlets when I had cooled them. One was the beauteous four or five that would grace the pages of Delicious Delicious Delicious, the other were the uglies that could be scoffed immediately. You can see that I scoffed the wrong pile. But I'm not sorry.

Frangipane Tarts
adapted from Jamie's 30-Minute Meals

You will need:

250g plain flour
125g butter, cold and cut into cubes
1 egg

100g ground almonds
100g butter, room temperature
100g caster sugar
1 egg

jam - enough to fill your tarts

  1. First make your pastry: rub the cold butter into the flour. Work quickly, because you don't want the butter to melt. But don't worry about it - I managed, so it isn't hard. When you have a crumby looking mixture, add the egg. Work it through with your hand, and gather the pastry together to form a ball. Wrap this in cling film, flatten slightly and chill for at least 30 minutes.
  2. Roll out the pastry on a floured surface; you want it thin. Cut rounds and use to line a muffin tray. You should have more than enough for 12, so keep the rest in the freezer. Unless you want to make more than 12.
  3. Line the pastry filled muffin indentations with foil, fill with beans, and bake at 200°C for about 15 minutes.
  4. Add a generous teaspoon of jam - I used raspberry and lemon and vanilla - to each tart case, then cover with a mound of frangipane. This is easy to make - using a spoon, beat together the egg, butter, almonds and sugar. That's it.
  5. Bake for around 20 minutes at 180­°C. Done.

Monday 11 October 2010

Tonka Bean Ice-Cream

Something about the fact that tonka beans are banned by the USFDA makes this ice-cream seem dirty, sexy and illicit. Which makes me love it even more.


I have been re-appraising my feelings about Paris since this post. I was there again recently, the weather was perfect, and strolling round with Erasure playing on my iPod, I fell quite in love with the city. I may have been helped along by the amazing fig tart that I had at Jocteur, a place I found tucked away in a place I rarely venture, but will be revisiting, but even so. Consider my opinions momentarily changed!

(Stop laughing at my Erasure confession. They are highly underrated.)

One of the things I do really like to do whilst in Paris is to hit up (I have become an American) G. Detou for vanilla beans. In Cardiff, if I try really hard I can just about find a bottle of Madagascan vanilla extract, though it may cost half of my salary; at G. Detou, I can get little glass tubes of vanilla beans and choose if I want them to be from Madagascar or Tahiti. What can I say? I like to have a choice.

Anyway, just recently, I noticed that in addition to selling vanilla, the shop also stocks 'fèves tonka', and that I had no idea what they were.

Now, reader, if we were ever to go speed dating (which is unlikely in the extreme, but go with me on this), and we each had to reveal what our weaknesses were, my confession would be that I am unable to walk away from 'new' foods, especially herbs and spices. Sometimes this works to my advantage and I end up with something I like (say it with me now: 'harissa'); other times, I am left, months later, with a bag of unused rubbish (one word: 'matcha' - it doesn't work in cupcakes, and are we really all about to start practicing tea ceremony at home? Exactly).

There is no getting away from it: they resemble dead beetles.

The tonka beans may fall into the first category, though there is the potential for them to end up in the second as well. It depends if I am able to get over my current distaste for crème brulée or not, since I think tonka is definitely a flavour to be used in creamy desserts.

In case you too are like me, and have no idea what a tonka bean is, our good friend Mr. Wiki will talk you through it. All I would add is that while I agree with the likening of their aroma to vanilla and almond, I can't detect any cinnamon flavour at all. In fact, the fragrance reminds me of the preserved cherry blossom leaves used to wrap sakura mochi more than anything else.


I made this ice-cream to serve with some melting chocolate fondants, for which you will get the recipe shortly, but in all honesty, you could serve it alone. I mean that in both contexts. Some things are too good to share.

Tonka Bean Ice-Cream

You will need:

5 egg yolks
600ml single cream
125g caster sugar
1 tonka bean, grated

  1. Heat the cream and grated tonka bean together over a medium heat. Stir every now and again, and do not let the cream boil. When it's nice and steamy, turn the heat off and clamp a lid on. Allow to infuse for 5-10 minutes.
  2. In a medium sized bowl, beat the egg yolks with the sugar. You don't need to incorporate air, just make sure that the two are well mixed.
  3. Pour the hot cream onto the yolks, stirring constantly to prevent any scrambling. You could strain the cream first, but I like the tonka bean flecks.
  4. Rinse and dry the pan used to heat the cream, then pour the custard back into it and heat gently, stirring constantly, until thick and creamy. Aim for the texture of thick cream, and never allow it to boil.
  5. Remove from the heat, pour into a bowl and cool. Then freeze according to your ice cream maker's instructions.

Thursday 23 September 2010

Banana Refrigerator Cake

OMG. Say you don't.

There's been something of a casein build-up in my fridge recently. Remember all the hoo hah several years ago about butter mountains and wine lakes in the EU? (A note to the unaware - that's what's known as figurative speech. Excited foreign nationals need not rush to book air tickets to Brussels just yet.) Well, it's happened to me. Owing to a top secret, can't-tell-you-anything-about-it-so-don't-even-ask project of mine, I have had to buy 'a great deal' of cream cheese over the last few weeks and months. It has been what I would call horrendous/fabulous. Horrendous for the calories and fat; fabulous because I love cream cheese.

The point. I always take such a long time to get to the point.

Much of it has been languishing though - love me those schedule changes! - and needed using up. Along with some almost black bananas that I don't even remember buying - the to-ing and fro-ing of a flight attendant makes trips the supermarket unmemorable. (Though let's face it - there's nothing particularly memorable about the Co-Op on Crwys Rd anyway, is there?) And some white chocolate bar things that were from... I don't even know where they were from. How did that happen? My cupboards need sorting.

So I called up Rose Levy Beranbaum and asked her, 'Rose, what am I going to do with all of this junk in my kitchen?'

She said, 'Boy, that's what my darned book is for. Now get off the phone, I'm expecting a call.'

(Rose doesn't actually speak like that at all. She's a very articulate and well spoken lady.)

So, a return to Rose's Heavenly Cakes it was. I have mentioned how much I love the book before, so will spare you this time. But I do. I love it, and all the more so for this banana refrigerator cake with white chocolate cream cheese frosting.

You have read correctly. I said banana refrigerator cake with white chocolate cream cheese frosting.

The deal here is that there's no butter in the cake, so it stays soft in the fridge, which is where you need to keep it since it is covered with lovely white chocolate cream cheese frosting. (This is making me drool...)

Reader: I have made a lot of cakes for this blog, to most which you have born witness. I say 'most' because I burned one t'other day on account of the gin gimlets, and nobody is bearing witness to that. Not for nuthin' and no how. The thing is, I don't think I have ever made a better tasting one. Ever. Such is the power of the Rose.


Let's just get to the recipe. I can feel some of you are actually going to make this one. I simplified Rose's frosting, but you can get the ur-recipe here.

Banana Refrigerator Cake
adapted from Rose's Heavenly Cakes

You will need:

2 very ripe bananas
125 ml crème fraîche or sour cream
2 large eggs
1 1/2 tsp vanilla extract
170g caster sugar (or soft brown sugar, I didn't have any)
125ml vegetable oil
200g plain flour (cake flour, should such be available)
1 tsp bicarbonate of soda
3/4 tsp baking powder
1/2 tsp salt

  1. Grease and line a 23cm round cake tin. Pre-heat the oven to 180°C.
  2. Sift together the flour, salt and leavening.
  3. Mash the bananas and mix in the sour cream and eggs. I do this with electric beaters in a large bowl, but Rose suggests a food processor. You must make up your own mind.
  4. When the mixture is smooth, beat in the oil and sugar. Then add the dry ingredients and beat on high speed for 2 minutes.
  5. Pour the mixture into the pan, and bake for 30 to 40 minutes, until the cake tests done.
  6. Cool for 10 minutes in the pan, then invert onto a wire rack. The cake humps slightly in the centre, but upon cooling, it's less pronounced.
  7. Frost.

White Chocolate Cream Cheese Frosting

You will need:

200g full fat cream cheese
200g white chocolate

  1. Melt the chocolate and cool slightly.
  2. Stir in the cream cheese.

Tuesday 21 September 2010

Italy

Delicious Delicious Delicious is de-camping to Italy for a week. Mr. P is going with Mr. Other P to stay with Francesco and Bob and look at their olive trees and eat their pasta. Just to make sure that everything is OK.

I don't know if I'll be able to post anything when I'm there, but have a few things up my sleeve which are scheduled to post automatically while I am away, so you won't be left entirely without you usual dose of drivel from yours truly.

I'm taking my camera and notebook. Get ready for good food!

Monday 20 September 2010

Rose Macarons


Ce sont des macarons malformés. Never rush a macaron, my dears. Never.


I've been thinking a lot about Paris Syndrome recently. I'm someone who thinks the city is horrendously overrated, overpriced and underwhelming, and can quite see why large numbers of tourists each year fall prey to the condition.


You want sunny weather, clean streets and blue skies; tree lined boulevards and green parks; the smell of freshly baked baguettes and window displays filled with beautiful patisserie. You do not get it.


What you get is all the dirt and grime of any big city. There is no way to enjoy the unbelievably expensive coffee you ordered at the corner cafe when all the clientele are clutching at smoking Sobranie Black Russians, and waving them in your faces. Then there are the dogs: let us not mention the dogs and their mess. Considering all of the above, one can understand the poor tourists' syndromes du voyageur.


Still, there is the Eiffel Tower.


I am being overly harsh. It's just that over-turning a lifelong dislike for the place is proving difficult.


Pierre Hermé is helping me to do just that though. I was at his place on Rue Bonaparte recently and re-reconfirmed my love affair with the macaron. I had one that was flavoured with olive oil and vanilla, and which was, well, obscenely delicious. They should be prescribed as a cure for Paris Syndrome, and Mr. Hermé should be given a white coat to wear to work.


Just a suggestion.


Also among the flavours I selected was a simple - if we can call any macaron simple - rose scented number, and since I don't quite have the guts to attempt the olive oil-vanilla version chez moi, I decided to give it a go to take to some friends I was visiting. I seem to have gotten in to the habit of doing that - promising macarons - and really must stop it.


Time was not on my side; you can see that from the knobbly, gnarly lumps on the top of my mac shells. I was in such a rush that I under mixed the party-pink batter, and didn't want to stop and correct it. But I wanted to post them, my C- macarons, anyway, because the last few batches I have turned out have been very good and I want you to see that I can mess up royally as well.


Plus, I wanted to share with you my new and improved filling for macarons, which beats anything else in the world. Bar olive and vanilla ganache.


Mr. P's Rose Macarons

It's worth pointing out that Pierre Hermé uses the Italian meringue method of macaron making, and mine are French meringue. You can find the recipe and method here. Omit the cocoa, and add a small dab of red colouring gel once the meringue mixture has been beaten to soft peaks. Put together with:

Mr P's Stupendous Rose Cream

You will need:

100g white chocolate
100g full fat cream cheese
natural rose essence or rose water

  1. Melt the white chocolate in a suitable bowl in the microwave. I do this on half power, in 30 second blasts. It takes about 90 seconds all in. If you have no microwave, place the bowl over a pan of simmering water and melt the chocolate that way. Set aside to cool slightly.
  2. Add the cream cheese and mix together until smooth.
  3. Add drops of rose essence or rose water to taste, and mix in thoroughly. Rose flavourings vary in strength enormously, so go easy. If you live anywhere near a Middle Eastern or Indian grocery, get your rose water there. It will be cheaper and better quality than any or the prettily packaged ones you'll find in supermarkets. Iranian rose water is the best. Promise.

Thursday 9 September 2010

Gin Gimlet


We're drinking hard liquor today, people. Please enjoy!
To go with, I'll give you some drunken beer babble: my thoughts on university education. Please also enjoy!

I'm not saying that it (university education) is a waste of time - so don't jump all over me, OK? - but I do think, looking back at what we actually studied when I was a student, that some of what we studied in those lectures had little useful application to real life.

My European Literature module for example. Or The Cultural History of Japan. I wonder if they still torture people with those?
Tell me that my Heroes of the Torah glasses are not fabulous.


In my final year, I took a module on French crime fiction, and thought at the time that it was going to be a similar story. I mean, we were reading whodunnits for crying out loud.

In the end though, I did actually enjoy that particular class - it was probably the only one I ever did the reading for on time, albeit in translation, and I loved the arguments about how 'noir' some of the texts were. I mean, as if we, a bunch of undergraduates, had any idea.

University will do that to you.


Now. Here's the thing. Because of this crime fiction module, and the fact I really didn't know anything about crime novels (or what hard-boiled crime writing was), I did a bit of background reading at the time. Only a few novels. nothing major, but I did read Raymond Chandler's 'The Big Sleep' and 'The Long Goodbye', the former being on the recommended reading list.

They don't scream USEFUL APPLICATION TO REAL LIFE, granted, but they did come to my rescue (or downfall - ultimately, I burned a cake) when I wanted a gin and tonic the other day and found, as usual, that we had no tonic, a situation equal in terms of frustration as finding no milk in the fridge when you've already made your cup of tea.

I didn't kill myself. I saw we had Rose's lime cordial in the cupboard and Terry Lennox's instructions for making a gin gimlet came to mind: 'half gin and half Rose's lime juice and nothing else.'

I remember reading the passage about gimlets in the book and thinking to myself that it was probably all down to the drinking of such rough drinks that Terry ended up with scars on his face. Yet look at me now! I seem to have acquired a taste for them myself. I was quite surprised, because I didn't think a drink made from gin, and what is basically squash, could taste any good. But it does! It's superb.


I think you need ice. But otherwise, I wouldn't add anything, and I certainly wouldn't bake (well, never again...) while drinking one of these, otherwise your Southern Manhattan Coconut Cake will end up black as soot, and the only cure will be another gin gimlet.
Unversity: the foundation of alcoholism.

Apparently, the rabbis on these glasses aren't real. I wanted to do a blow by blow account of why each one is a Hero of the Torah for you, but can't.

How fabulous are these Judeo-kitsch glasses by the way? Told you I love Fishs Eddy. They haven't sent freebies yet. I still dream.

Gin Gimlet


You will need:


Gin (I used Gordon's, which I would never buy, but some was left at our house after a party)
Rose's Lime Cordial
  1. Mix the two ingredients in equal measures, and pour over ice.
  2. That's it.

Sunday 5 September 2010

Blackberry Jam

If I were a real food blogger, I'd have made these. But I'm a faker!


Not all that long ago, I had an email from Tate and Lyle rep asking me if I wanted to try some of their range of sugars, which are all now Fair Trade, in the dishes I create for this blog.

I get a lot of junk email sent to the blog's inbox. If it's not Mr. Ogbonna in Nigeria telling me that stand to inherit 500 USD (yippee!), it's someone who wants to sell me cheap Viagra, or even better, cheap and natural Viagra. Sorry guys; I am just not interested.

Free sugar however, I'll take. Even though I pretty much exclusively use Tate and Lyle branded stuff anyway, since that's what my local supermarket stocks. So I agreed to do the trial, and the next day at 7:00am, 5kg of assorted sugar arrived on my doorstep. You must admit that that's a rather amazing start to the morning; beats court summons and phone bills any day of the week!


I didn't really know what to do with it all, but since there was a bag of jam sugar in there, I decided to go with that for a first try. This necessitated a trip to the allotments to pick the blackberries that grow on the scrub land at the edges, and I roped in my friend Lucy to help. I even made her wash and sterilise the jars that had been building up in the shed - Tate and Lyle may trade fairly, but I don't. (Don't worry, I've promised her a share of the finished jam!)

Last time I made jam, I used a different brand of jam sugar, which had completely different usage instructions and a lighter grain than Tate and Lyle's. I thought I'd just wing it and do what I'd done before, which turned out to be a mistake - I had to reboil the jam to make it set properly. The lesson to take away from this, my friends, is not to cut corners just because the sugar is free.


You've already seen that I made crostata with this jam. I recommend you do exactly the same thing, but I was recently in a used book shop and read something that made me want to try something a little unusual (or which seemed so to me). I always seek out the children's section in old book stores, on the hunt for Enid Blytons. I don't actually collect them, but loved her books so much as a child that I like trying to find first editions now. Flicking through a copy of one of the Secret Sevens I found a scene that I remember reading as a child, in which the Seven, holed up in a secret meeting in the Peter's garden shed, drink blackcurrant tea made with hot water and leftover jam from a pot in the larder. Figuring that since I've had yuzu cha before, and liked it, there was no reason not to try my own home-spun version; it was quite nice. Much better than the last time I was influenced by food in a children's book - Mum thought I was crazy when I asked for bread and margarine for my after school snack as a child (having read Roald Dahl's Matilda), and after having tasted it myself, so did I. I was straight back onto the scones after that, let me tell you.


Blackberry tea.


If you want to be an expert jam maker, which I am not, you would do well to buy a copy of Preserves: River Cottage Handbook No.2. It is an amazing book, and lists recipes and methods seasonally, so you could do a different jam, relish or chutney every month for several years and never make the same things twice.

Blackberry Jam

You will need:

Blackberries
Jam sugar

  1. Pick over the berries and discard any bad ones. Pour all the fruit into a large bowl and cover with water. Add 1 tbsp salt and leave to soak for an hour. Then drain and pick over the fruit again. You will find a horrifying amount of bugs. Don't worry about it now, just be thankful that you didn't skip this step.
  2. Wash your jars and dry them off in a cool oven to sterilise. Boil the lids in clean water for 10 minutes, and dry them off in the oven as well. Put a saucer in the freezer.
  3. Weigh your fruit, and put it into a large pan with an equal quantity of jam sugar.
  4. Over a medium heat, stir and mash the fruit and sugar until the sugar has dissolved. Resist the urge to add water as you'll have to boil the jam for longer.
  5. Bring the mixture to the boil, and stop stirring. It will rise in the pan and spit; be careful.
  6. After 6 minutes, test for setting point. This means drizzling a small amount onto the saucer you put in the freezer earlier and poking it with your little finger. If the surface wrinkles, setting point has been reached.
  7. Pour the jam into the jars and seal immediately.
Related Posts with Thumbnails